0

Living Rooms

Kitchens

Furniture

21 In kitchen/dining/ living room

Formerly Forlorn to Fantastically Formal

Do you like to go to model homes? I do. They’re a great place to pick up fun ideas and inspiration for home design. However, they come with a downside. You know that feeling you get when you go to a model home, and everything is so well put-together and dazzling, and each room beautifully compliments the next, and you leave feeling slightly depressed and tempted to burn your own pathetic house to the ground? That’s how I feel when I go to Denise’s house.

Denise is a dear friend of mine, and one of those people who makes everything look effortlessly perfect.  She’s thrown baby showers nicer than my wedding reception. She’s the worst. Just kidding, she’s the best, she’s everything I want to be. Love you Denise!

She moved into a new home not long ago, and has been busy making it Denise-worthy, so let’s take a look!

This was her formal dining room before. You would think a room with a sweeping staircase and a chandelier hung from the vaulted ceiling would be pretty impressive on its own merits, right?

Not so much. That’s exactly what this before room had, but it wasn’t about to knock anyone’s socks off. Some of the problems were that the the wall color was a squeamish flesh-tone, the furniture was way too small for the room (although to be fair, it does look like the previous owners were in the process of moving, so perhaps they just had the tiny furniture in there temporarily … it’s possible), the curtains were limp and the carpet washed everything else out.
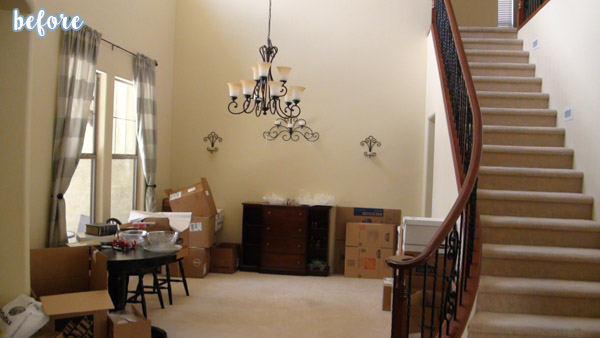
White Hutch with Formal Dining Room Before2

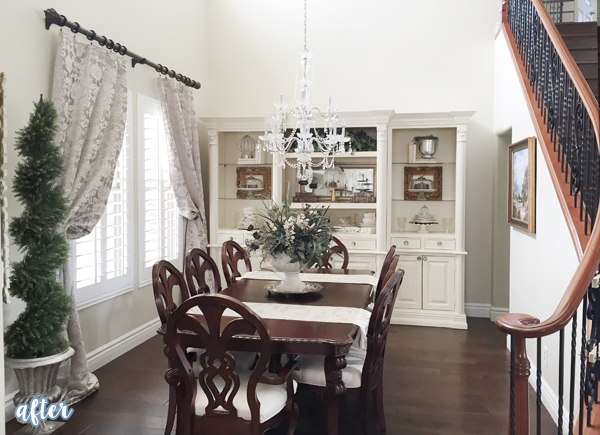
White Hutch with Formal Dining Room

But look what a beautiful difference some small (ok, mostly big) changes made! For starters, she replaced the carpet with hardwood, the paint was toned down into a light neutral ‘flesh-free’ zone, and she added plantation shutters and a new chandelier.

Of course that’s going to make any room look better. But I think the real key here is SCALE. The new hutch takes up nearly the entire wall, vs. the itty bitty buffet in the before picture.  The eight-seater dining table is substantial enough to anchor the entire room, the curtains are voluminous, and the even the curtain rod has been upgraded.

You might think that this room cost tons of money, but it might surprise you that beautiful doesn’t have to mean expensive.  Or, it probably doesn’t surprise you at all, if you’ve been a reader here long enough.  Check out how that hutch started out:
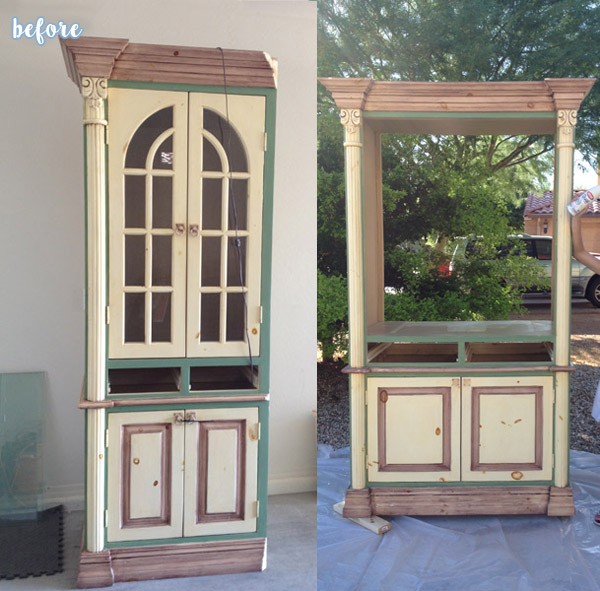
 

White Hutch with Formal Dining Room Before

Yep, total Craigslist find. Denise ain’t no fool.


Now, let’s head across the hall to the former formal living room. Same story as before. My socks are still firmly attached.
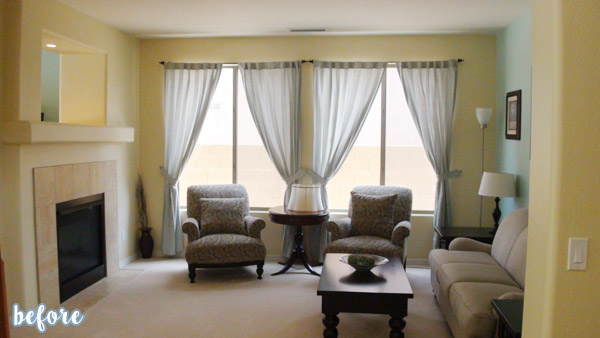
Formal Living Room Before


Formal Living Room

Oh but not anymore! This room officially knocks my socks off.  Let’s talk about that new mantle. And the wainscoting. I’ll wait while you do a little scroll-up scroll-down, if your eyeballz can handle it. SO MUCH BETTER.

And again with the scale. Floor to ceiling drapes, furniture pulled away from the walls, and another grand chandelier to dazzle the eye and make me want to come home and punch my own light fixtures in the face.
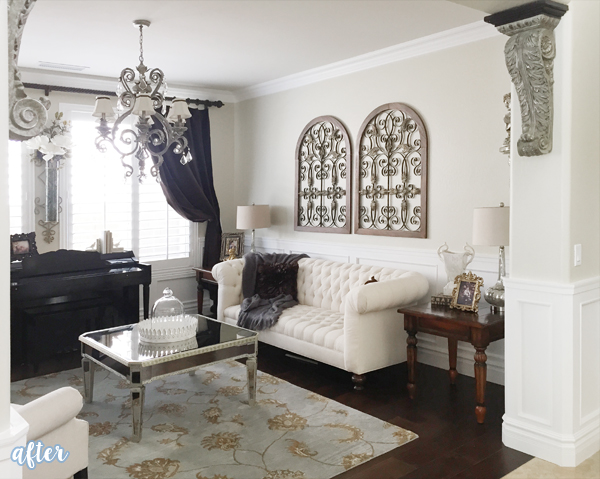
 

Formal Living Room 1

And she does it all with two boys and a toddler girl. Once I find out her secret, I’ll let you know.
11 In desks/hutches/buffets

Two Repurposed Into One

Today’s makeover brings to mind the Spice Girls super ballad: 2 Become 1. Remember that song? I just looked it up and was surprised to see that it came out almost 20 years ago. HOLY CARP. That makes me feel old. Then of course I had to watch the music video. Those ’90s special effects were in full effect, nothing but green screens and wind machines. And correct me if I’m wrong, but I think there is a baby deer inexplicably standing in Times Square at the end? Did I imagine that?

Anyway, the Spice Girls taught me many things, things about puffy vests and parachute pants, faux fur and go-go boots, that Posh Spice was, is, and always will be the best Spice, and also all about the beauty and magic that occur when 2 become 1.

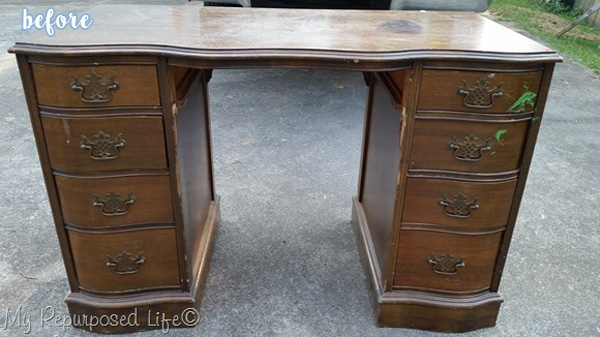
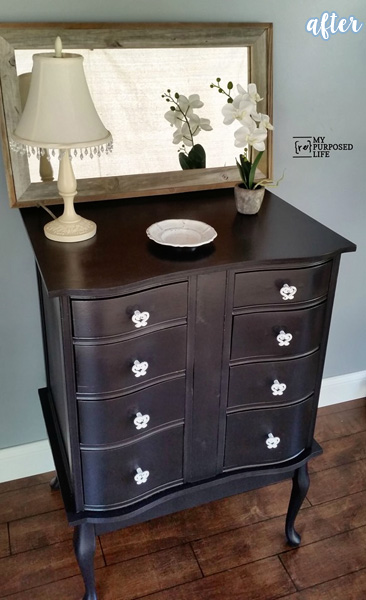
Gail taught me that too, minus the wind machine. She took the two sides of this desk …


Black Lingerie Chest Before


Black Lingerie Chest

… and repurposed them into a lingerie chest. What?! Who thinks of such things? She’s amazing. She should be the sixth Spice.

Set your spirit free … it’s the only way to be-eee. You really should go watch the video. And then be sure to visit Gail at My RePurposed Life!

6 In kiddie

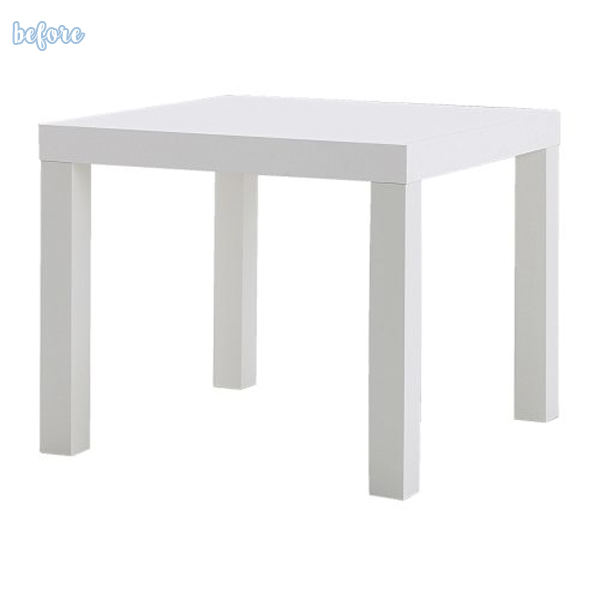
It’s your LACKy day.

Ahh, the Ikea LACK. The humble little table that lacks pretentiousness, expensiveness and another word that ends with -ess (for the purpose of finishing this sentence). Heaviness? Tell me if you think of a good one.

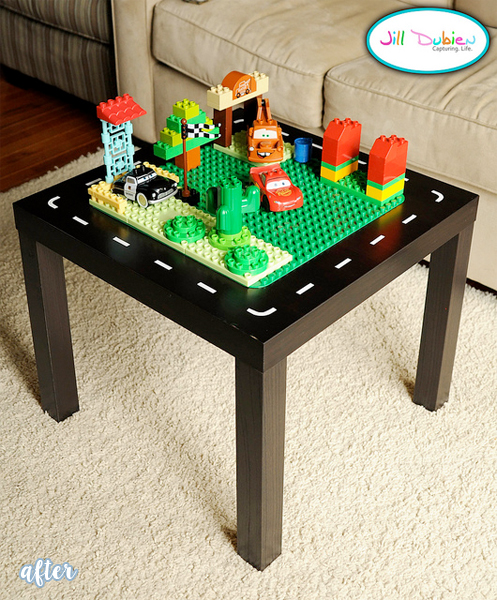
Anyway! The LACK can’t be beat. It’s a sturdy little side table that costs somewhere around $10 if I’m not mistaken, and can be customized as many ways as you can imagine.  Today, let’s look at a few customization that would thrill the little Lego-lover in your life.


ikea lack table beforelego lack makeover 2

Kim topped her LACK hack off with edge to edge lego plates, and added a hanging bar and containers (also from Ikea) to the side for easy storage. Because a lonely Lego is an evil Lego. Any barefoot parent would agree.


lego lack makeover after

Jill shrunk her Lego plate footprint to leave more room for a road. How cute. My little guy would probably zoom his cars around and around that thing until he passed out. See it on her blog Meet the Dubiens.


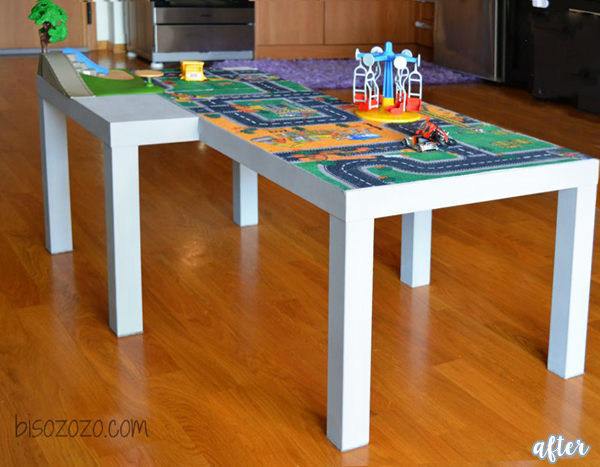
If you’ve got more than one kid, or more than one LACK, here’s a great idea from Zografia at Bisozozo.

lack play table makeover

Combine two to make one extra-long play table! Shoot, with how inexpensive they are, you could make a 25 foot long play table if you really wanted to. Please invite me over if you do, because I want to see that.


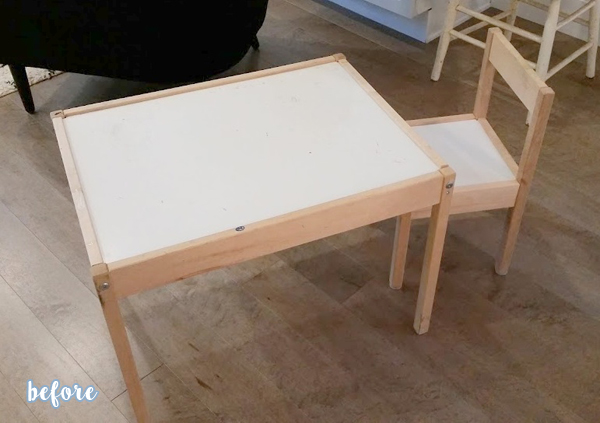
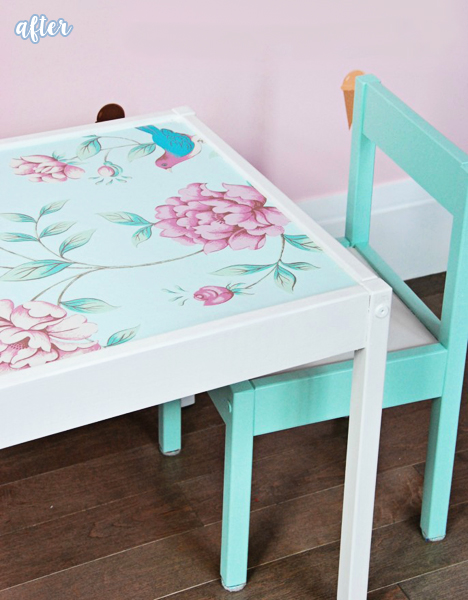
And for the kid more into tea parties and art projects than race cars and Legos, here’s a stunning little Ikea play table by Gemma.

Aqua and Flower Ikea Kid Table Before

Aqua and Flower Ikea Kid Table

She used a tiny piece of wallpaper to cover this tabletop, and then painted the chair to match. Aren’t the colors great? If you wanted to do something similar, don’t go buying a whole roll of wallpaper. You can order wallpaper samples, which are often very close to this size. But I could be wrong, and maybe they only send samples in 3×5″ sizes now, because you know how people like to work the sample system. Just like how they only give out 1/4 of a meatball at Costco now, instead of the whole ball. Just like a friend I once had who instead of ordering lemonade at restaurants, would order water and a bowl of lemons (complimentary) and then make her own at the table with packets of sugar. Some people.

Anyway! See exactly where Gemma got this wallpaper and more at The Sweetest Digs.

6 In tables/dressers

Dilapidated to Dazzling

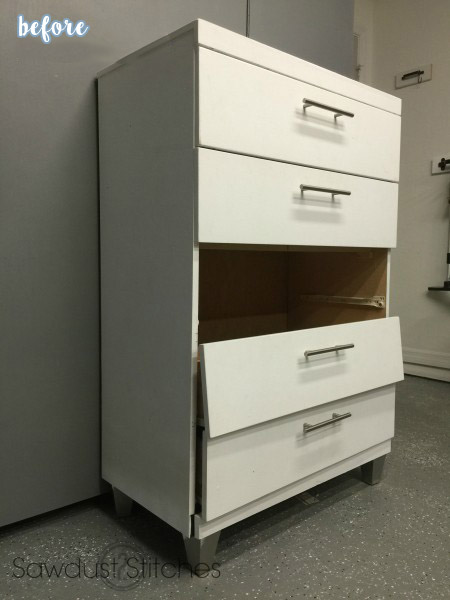
If you gave me this dilapidated old dresser to makeover, I probably would have … painted it. Stenciled it, if I was feeling ambitious. Changed the hardware if I was really on a roll.

But not Corey. She went above and beyond, and then above and beyond that, and then above and beyond THAT.

Wood and Gold Dresser Before

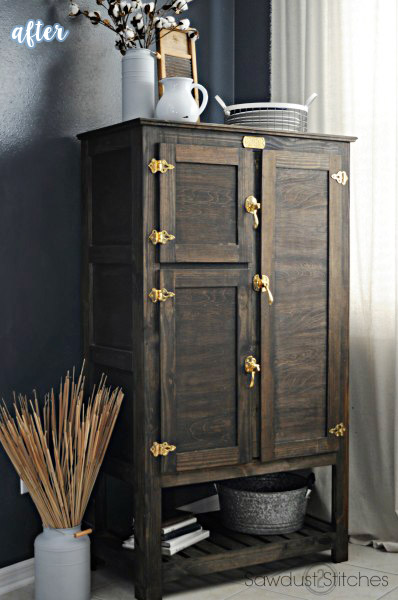
Wood and Gold Dresser

I swear, it’s the same piece! Underneath the new shaker style doors, show-stopping hardware, rebuilt top, extra shelf on the bottom, and stained paneling lurks the buried bones of the old dresser.  Scouts honor. Cross my heart. Pinky promise. I cannot tell a lie.

Check out Corey’s blog at Sawdust 2 Stitches to see her whole process.


10 In bathroom

Can this bathroom be saved?

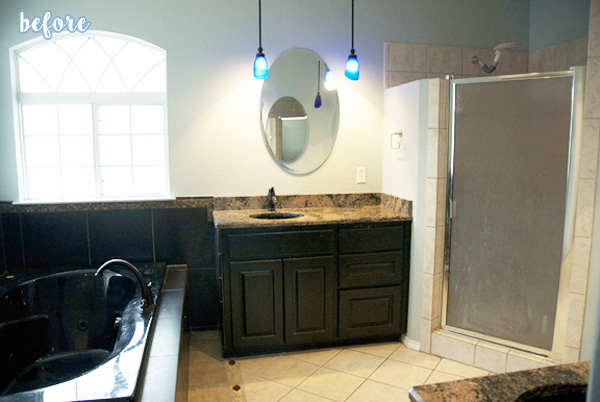
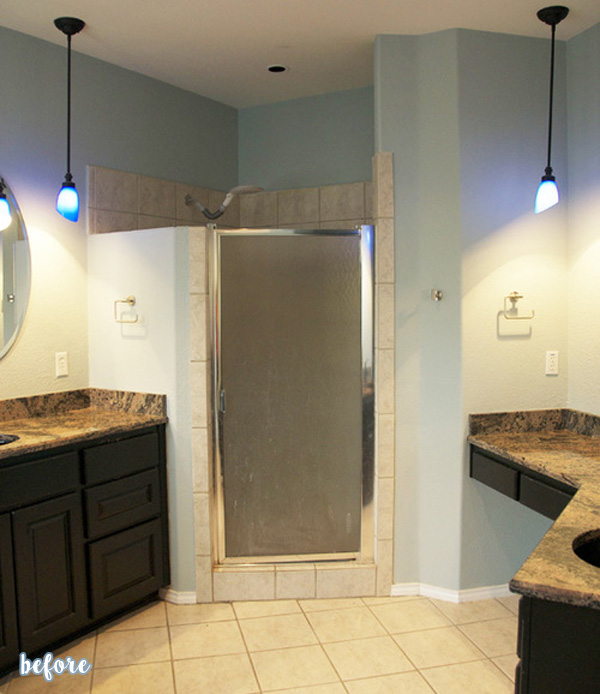
This bathroom needed to divorce itself. None of the items in here were compatible in the slightest. The all-black bathtub had nothing in common with the chrome shower, the pastel paint color did not play nicely with the heavy ‘Tuscan’ countertops, and the electric blue light fixtures were the secret lovechild of another bathroom altogether.

That’s when Jill stepped in to mediate. And sometimes mediation equals ripping everything down to the studs and starting over.

Black and White Bathroom Before

Black and White Bathroom MID

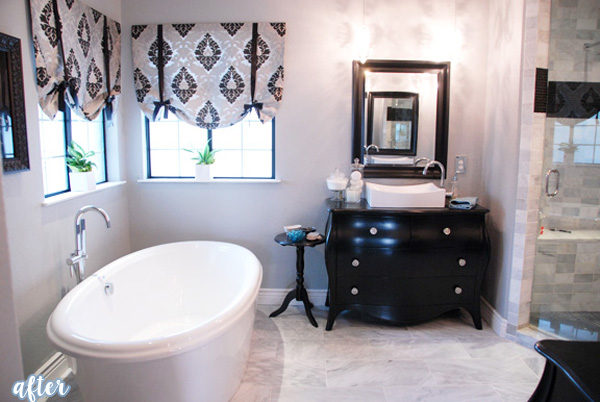
But was it ever worth it! With a streamlined color scheme and well-thought out fixtures, everything in here flows together harmoniously.

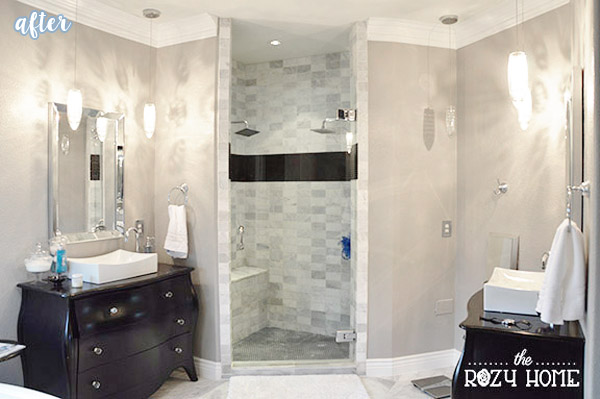
The shower used to be trapped in this corner of awkwardness, but Jill emancipated it by removing the extended countertop.

Black and White Bathroom Before 1


Black and White Bathroom NOW

It looks bigger, but it’s actually still the same size, even with the wall closed in and extended to the ceiling on the left. That’s the power of symmetry.  And the power of love! Don’t give up on your troubled bathroom, there is always hope!

You can read more about it on her blog The Rozy Home, where she talks about some of the small changes she’s made since she finished this remodel two years ago.  You may have noticed the different mirrors above the vanity in both after pictures.  Which look is your favorite?


Black and White Bathroom NOW 1

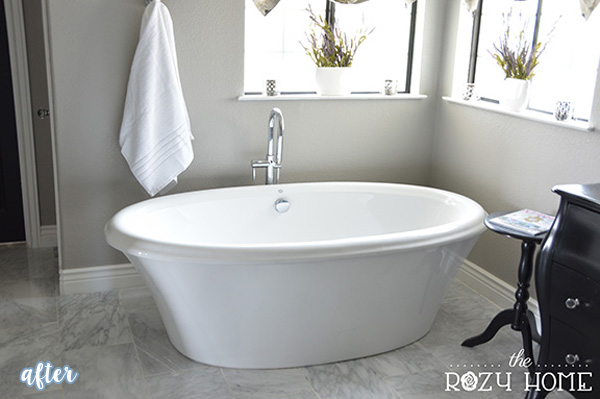
One more glimpse of that tub! I’m willing to bet a freestanding tub would improve almost any bathroom (and marriage)!

5 In Halloween

Thrifty Halloween DIYs (4)

Hey gang! I’m back again with more thrifty DIY Halloween fun. We’ve seen a lot of great makeovers each day this week, from junky pumpkins to creepy candles to haunted houses, and today I bring you …

… miscellaneous!

Sorry, not the most chilling category name ever, but I think you’ll still find it chock full of creepy creativity on the cheap.


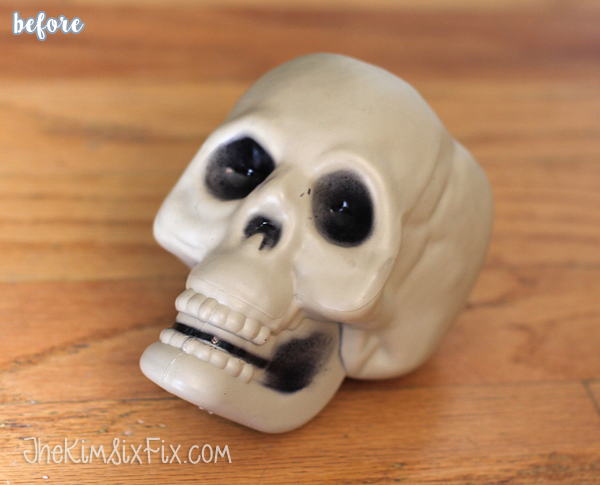
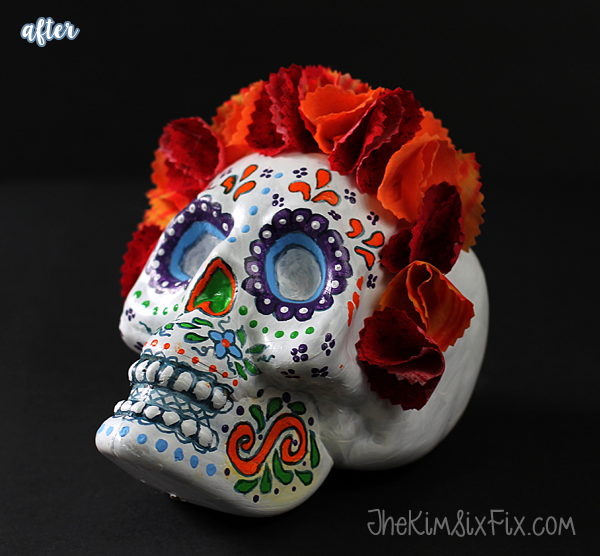
And what could be cheaper than the dollar store? Not much, unless there is a 50 cent store somewhere I don’t know about. But anyway, that’s where Kim picked up this plastic skull and decided to give it some help in the looks department.

Day of the Dead Skull Before

Day of the Dead Skull

Ay que bonita! She’s all fancied up and ready to celebrate Dia de los Muertos in style. These are called calaveras, or sugar skulls, and are a big tradition here in Arizona. There are tons of beautiful examples online if you ever get the itch to try it yourself.

See more at The Kim Six Fix.


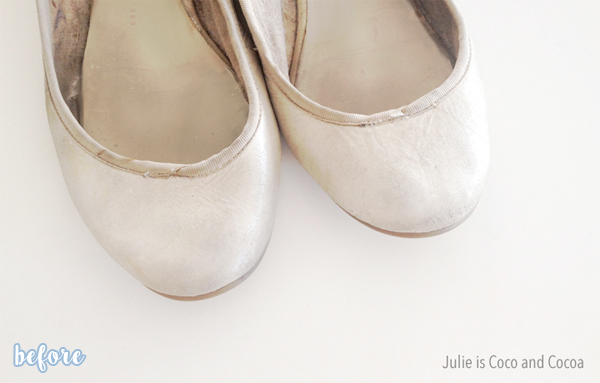
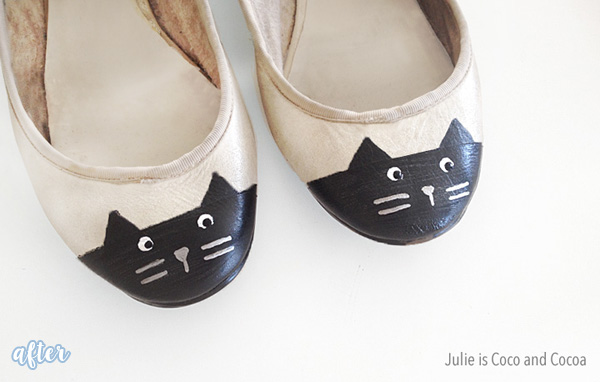
And moving from head to toe, check out this adorable idea from Julie at Julie is Coco and Cocoa.

cat shoes before

Cat Shoes

Cat shoes! What a fun idea for an old pair of shoes. You might like them so much, you wear them all year long.

Next up are a couple of projects from my friends in real life. I have two friends who are equally (if not much more) Halloween-obsessed as I am, and when I saw some of the recent projects they had been working on, I demanded (nicely) that they send me pictures so I could show everyone on my blog.

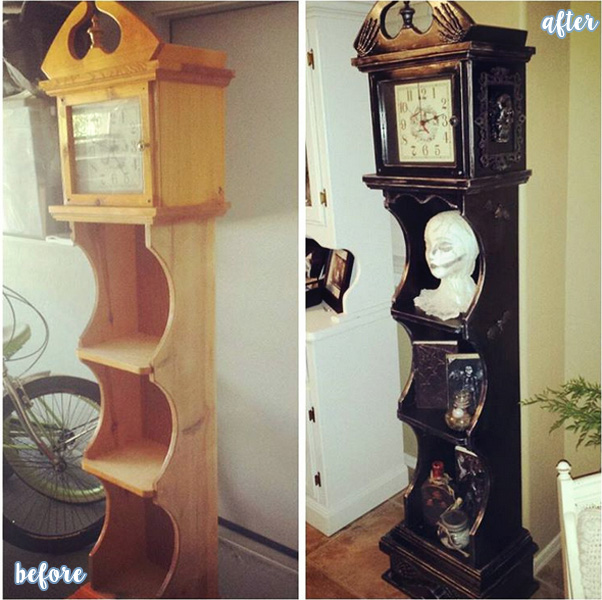
 skull clock makeover

This is was an unfinished clock from my friend Alicia, who finished it, and finished it hard.

She says “I couldn’t find a toy skull or plastic skull I liked for the side detail, so I made those out of clay.  The rest were dollar store goodies and cheap pressed wood frames.  I removed the bottom and used it as trim on the front side to make it more interesting.  And then spray painted the crap out of it, and rubbed silver paint on to age it.  Not bad for $20 bucks at Goodwill and less than $5 at the dollar store.”

She admits she made the clock just so she’d have more display space for the other Halloween things she’s made! She can’t stop, and she won’t stop.


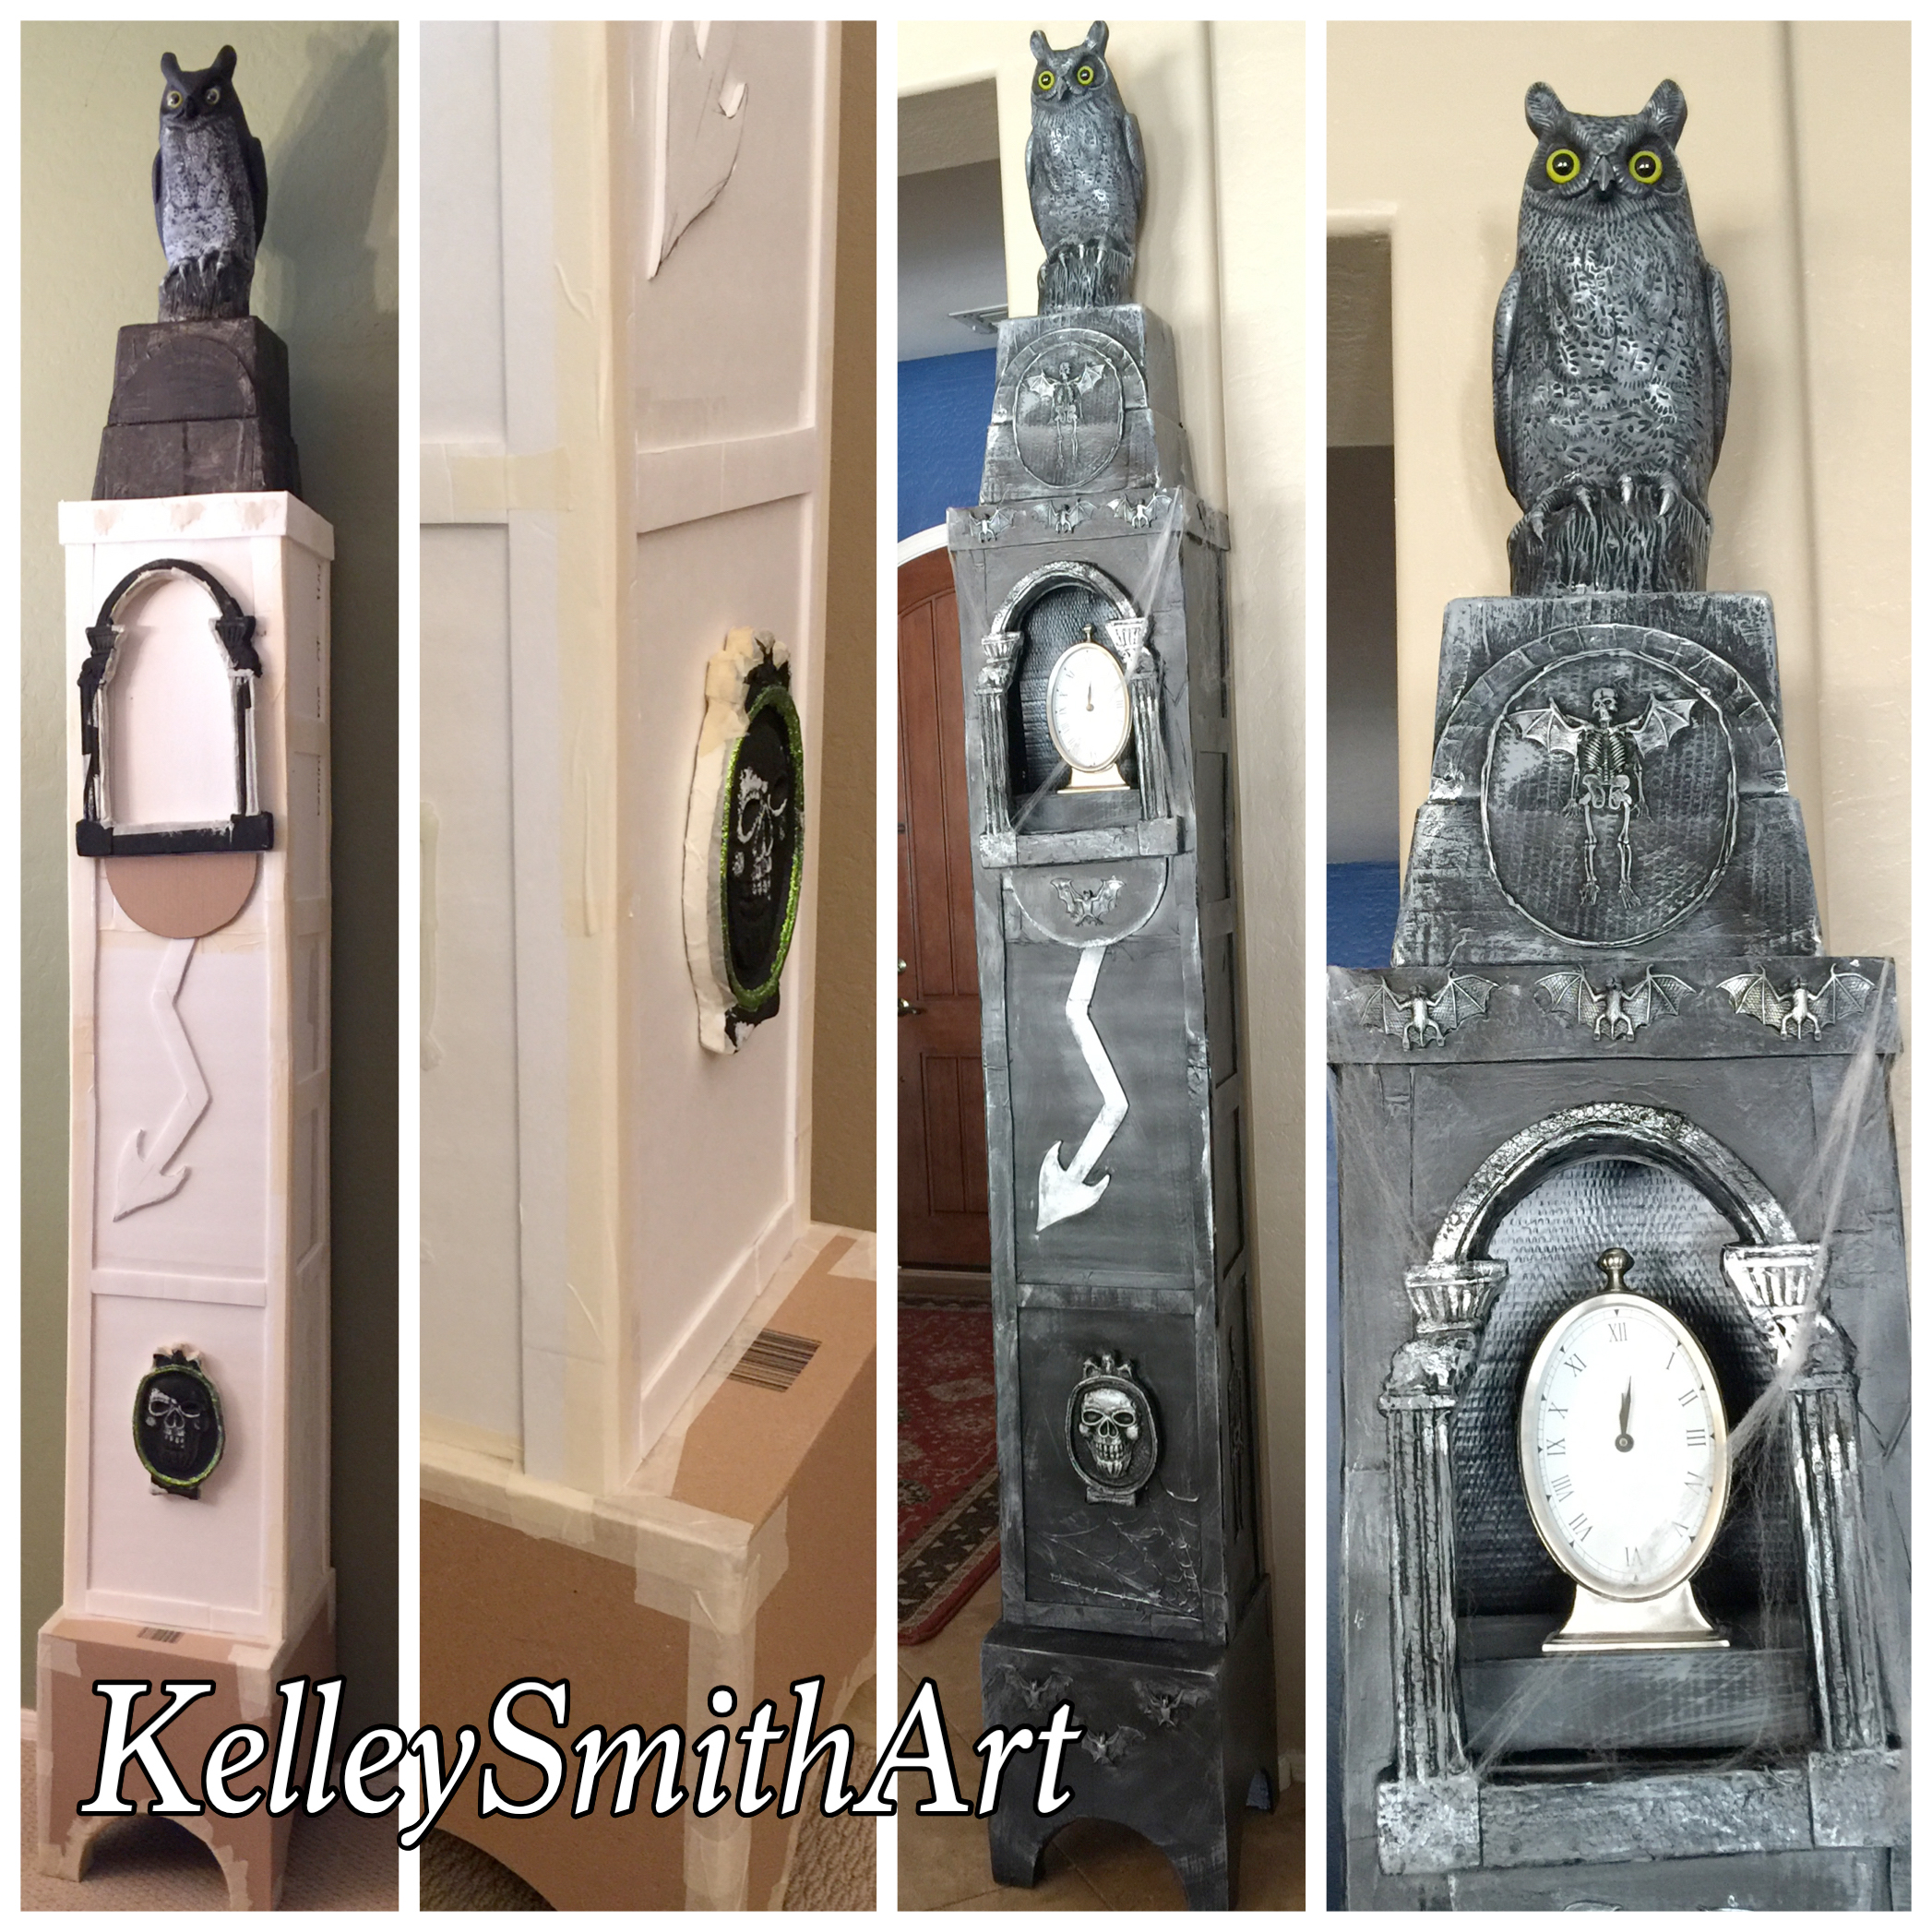
My other friend Kelley is a notorious Halloween fanatic.  She’s known in town as the Queen of Halloween. I wish I could take you on a tour of her house, because it would blow your mind. Most of her decorations are things that she makes herself, like this clock that she threw together with cardboard and dollar store items.

She said “It’s a little wonky but mistakes can become happy accidents especially if it’s a Halloween object. The owl and its styrofoam cooler base are from the dollar store, so are the embellishments. I cut apart a $1 gravestone to make the arch. Time was really the most valuable thing that I spent on this, but it was fun!”

kelley clock

Then she made a welcome banner for her house of of old books and eyeballs that she painted herself. Fabulously freaky!

spooky book welcome sign

She’s also planning a steampunk costume this year, so she’s been busy making some steam-ified weaponry. These were old toy guns from the thrift-store and are virtually unrecognizable now!

steampunk gun makeover

steampunk gun from toy gun makeover

I mean, come on! How great is that? Isn’t she great? She’s the greatest. You can see a lot more of her work on her instagram at KelleySmithArt. Give her a follow, you won’t be disappointed!


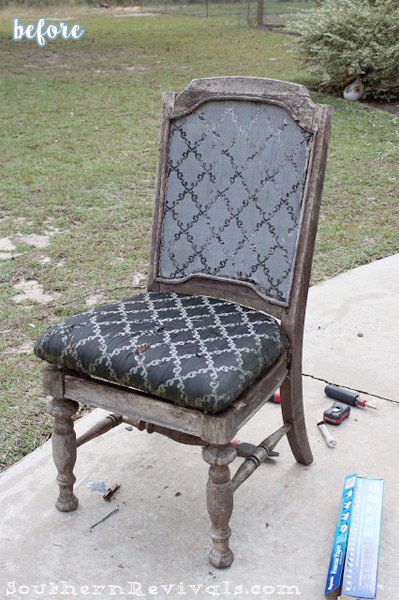
Last one for today, this battered and beaten up chair. Jamie was convinced she could do something with it, but every time she looked closely, it became more and more apparent that it was unusable. It had presumably been sitting outside for most of its life.

Untitled-1


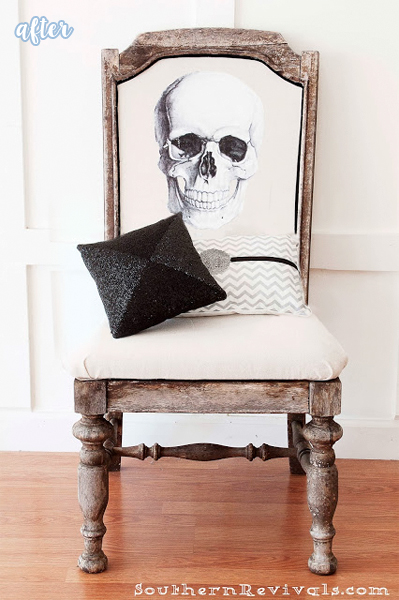
skull halloween chair makeover

But it turns out that battered and weather-beaten is the perfect condition for a spooky seasonal skeleton chair! It looks amazing!  Wondering how she applied that skull graphic to her fabric? Find out at Southern Revivals.


WEEK OF THRIFTY HALLOWEEN

Protected By
Shield Security PRO