0

Living Rooms

Kitchens

Furniture

9 In Halloween/ Uncategorized

Thrifty Halloween DIYs (3)

Hello, I’m happy you’re here! Glad I haven’t scared you away with all the SUPER SPOOKY Halloween makeovers I’ve shared so far this week.

WEEK OF THRIFTY HALLOWEEN

Today is day three of our thrifty week of Halloween DIYs, so if you’ve missed day one or day two, be sure to head back and check them out. I hope you’re having fun! Maybe this will become a new tradition.
And speaking of new traditions, the Halloween village is quickly becoming a holiday decorating staple just as much as ye olde traditional Christmas villages.So check out this haunted church that Kelli bought for her Halloween village for a mere $250.  HA! Of course she didn’t. That would be crazysnakes. (Even though extremely overpriced village pieces like that actually exist). Who spends $250 on a glorified nightlight? Someone who needs to adopt me as their friend.
So instead Kelli bought this inexpensive little Christmas church for $14.99.  As you can see in the before picture, it already looks a little haunted with the boarded up windows and the hole in the roof.  Guess what? Those details weren’t there when she bought it, she did that herself with polymer clay!halloween village beforehalloween village makeover

Then she really upped the spook factor with this superbly creepy paint job and a few more details, like the gargoyle on the bell tower. Fabulously terrifying! See her process on her blog Craft Shack.


Next, how about a princess castle turned haunted-Hogwart’s?

halloween castle before

halloween castle after

So very cool. Don’t you love how the lights are shining through the windows?

From the talented Tracy at General Splendour, whom I am publicly apologizing to for my ‘used candle’ rant from yesterday. I was totally not calling her out on her candles! They looked perfect to me, and 100% did NOT give me the creeps. Love you Tracy!  When I checked my comments on my phone and realized my post had made it sound like I was talking specifically about her candles, I was also holding a bag of dry tapioca (don’t ask) and then my baby knocked it out of my hand, and 100,000 little balls of tapioca went flying across my kitchen, so every time I pick up one of those little tapioca balls, I think of Tracy and candles and apologize fervently in my mind.


ANNNNNYYYYYYWAYYYYY …


Last one. This one kicks it up a notch from tabletop Halloween decor into life-sized decor! Well, almost life-sized.

Child-sized!

     haunted little tikes playhouse before

haunted little tykes playhouse makeover

I could only find the Etsy page of the woman who made this haunted playhouse – called Saki Girl – so I don’t know if it was for an actual kid to play with, or just some super rad yard decoration, but either way, I give it two skeletal thumbs up.

One thing I love about these types of projects is how much detail you can draw out with just paint. The lanterns and embellishments on the door and planters were all but invisible on the original, but they became prominent features with just a little contrasting color. Same with Kelli’s haunted church, she brought out so much more texture than what was there before, especially in the brick and roof. It’s funny that manufacturers go to the trouble to include all these great little details, then camouflage them with generic paint and colors.  It’s like they WANT us to repaint everything.


6 In Halloween

Thrifty Halloween DIYs (2)

Today we continue on with more fun and thrifty Halloween makeovers! Because Halloween is fun, and being thrifty is fun, makeovers are fun, yay for fun!

WEEK OF THRIFTY HALLOWEEN

For today’s makeovers, all you need is some black spray paint and a quick trip to the thrift-store. Also, swing by the dollar store on your way home.

Let’s go!

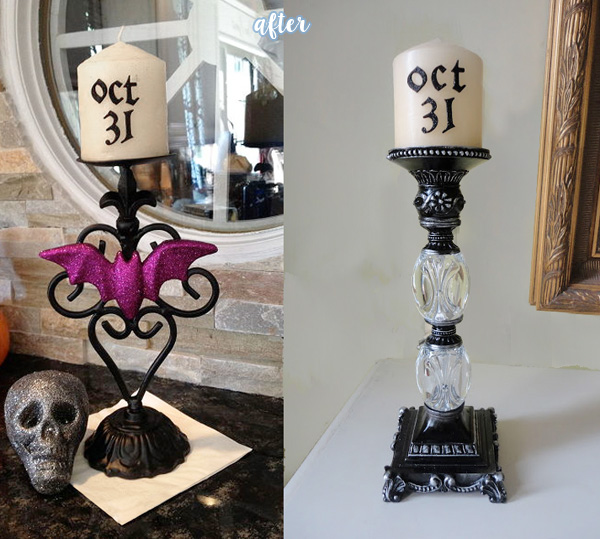
First, scrounge up some old candlestick holders at the thrift-store. Any shape or size will do, mismatched is fine. You can maybe even snag yourself a used candle while you’re there. Although I’ve always been kind of grossed out by the used candles at the thrift-store, and not much grosses me out. There are worse things there, surely. But dusty, half-burned candles really give me the shivers. Still, I guess Halloween is the best use for them in any case. It’s up to you.  (I’d recommend just waiting until you get to the dollar store).

Ok, now you’re at the dollar store! Get some fresh clean candles. Sheesh, this is turning into an issue. Now how about some bats or other spooky paraphernalia? Grab some glittery stickers too. Perfect.

Put it all together and …

halloween candles before

halloween candles after

… there you have it. Spooky, sophisticated and super easy! Wasn’t that fun? From Tracy at General Splendour.

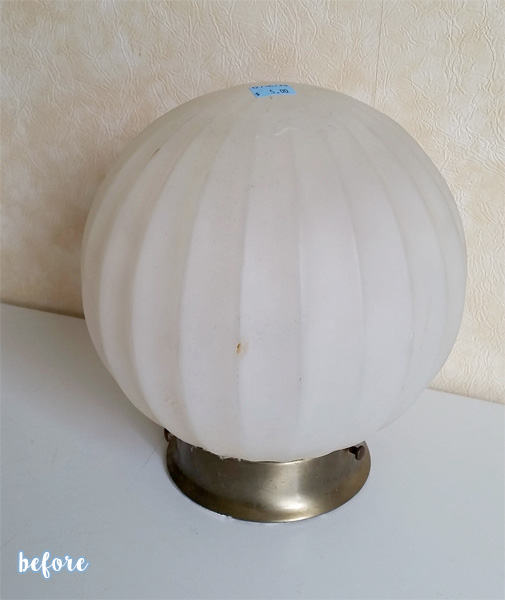
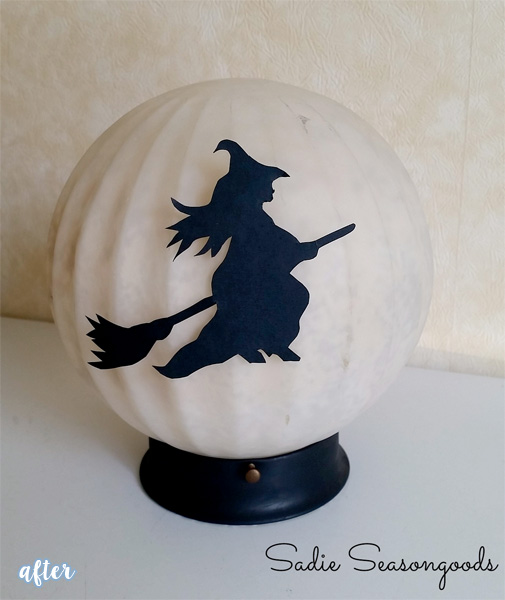
Now you’re ready for a bit more of an advanced project.  This time, look for an old globe light fixture.  These are usually plentiful at my local ReStore, so that’s a good place to check.  Spray paint the base black, and sponge paint the inside of the globe.  Cut a witch silhouette out of black paper and tape it on.  You’ve made …

halloween moon lamp before

halloween moon lamp after

A slightly mottled globe with a witch silhouette taped to it?

BUT WAIT!

Stick a battery operated light inside, wait for it to get dark outside and …

halloween moon lamp after lit

It’s the MOON! I think this is just so magical and great. I love it. I’m already imagining where I’m going to put the one I haven’t made yet.

From Sarah at Sadie Seasongoods.


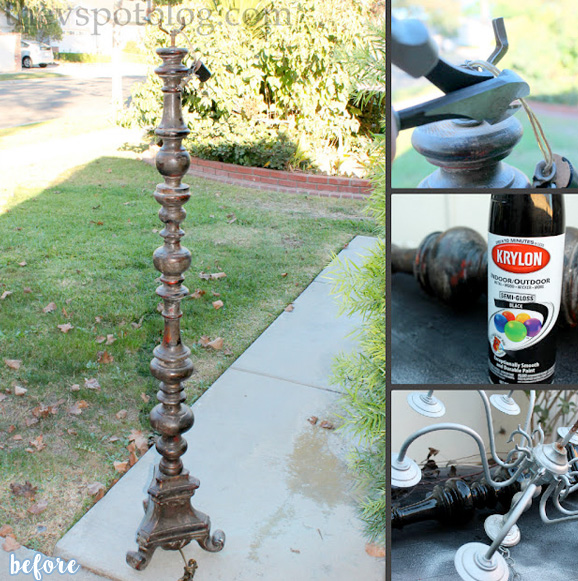
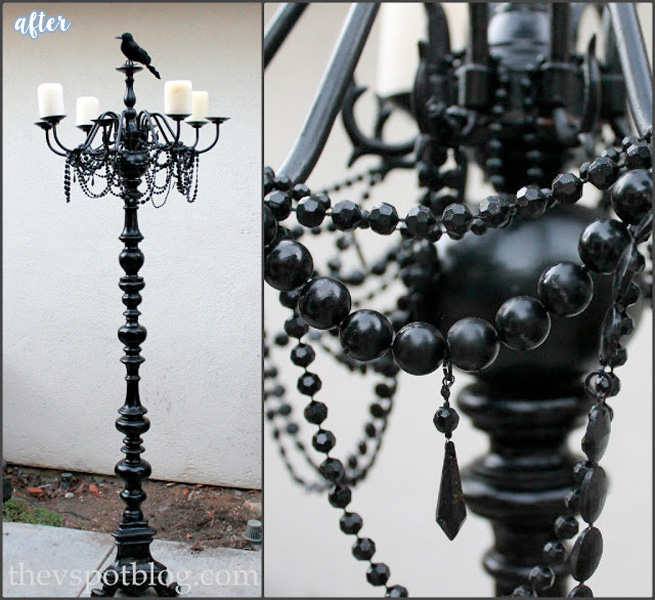
Are you ready for one more? You are a DIY Halloween expert by now, so of course you are.  Ok. Head back to the thrift store.  Get your grubby hands on an old floor lamp.  It doesn’t need to be in working order, we just want the base, so the more ornate the better.  Fingers crossed that there is also an old chandelier there that you can toss in your cart – again, no need for it to be functioning.
This time at the dollar store, look for some plastic bead necklaces. Usually these only come in Mardi Gras colors, so be prepared to spray paint them black. And buy some more candles. Nice, new candles.

This project takes a little finagling, but once you’ve got it figured out …

halloween candleabra before

halloween candleabra makeover

A dramatic candelabra! The hit of the party! Just stand by this thing and tell everyone you made it and no one will care that you didn’t even wear a costume or bring a dish to the potluck!

Vivienne had her husband insert a metal rod into the top of the lamp, then attached the chandelier to that to keep it securely in place. She spray painted everything black, then draped it in black plastic beads and topped it off with a faux crow, or a real crow who has excellent timing.  It could happen.

Isn’t it fantastic? See more details at The V Spot.

Catch up with yesterday’s Halloween DIY projects here!

6 In Uncategorized

Thrifty Halloween DIYs (1)

Hey gang! Since Halloween is one of my favorite holidays, I thought we could celebrate the season with a whole week of spooktacular (and affordable!) makeovers, starting today!

WEEK OF THRIFTY HALLOWEEN

I love pulling out and adding to my decorations every year, and some of my very favorite items are the humble little thrift-store knickknacks that I’ve spookified with a little love and paint. I don’t know why, I just find it so much more gratifying to make it myself rather than buying something mass-produced and found in every store. Plus, they cost like … hardly any dollars.  So you can really beef up your stash of scary stuff and save money and have fun doing it!

Do you agree? Are you with me? Thrifty Halloween-decor high-five?

Let’s go!

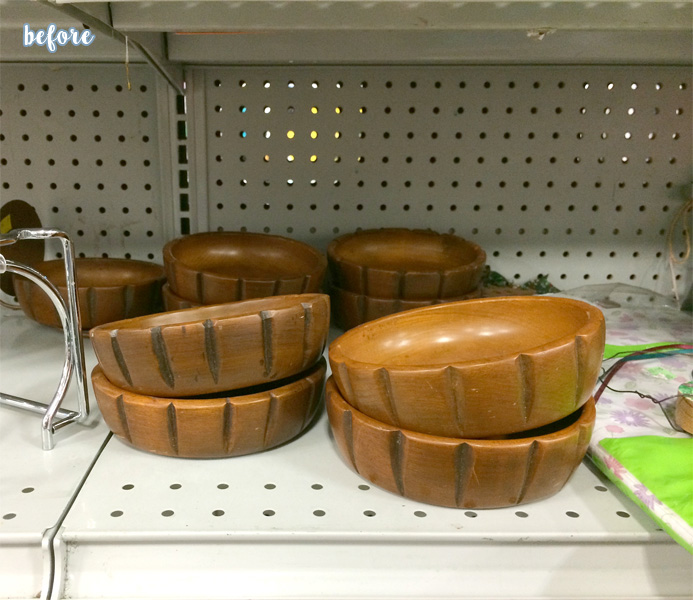
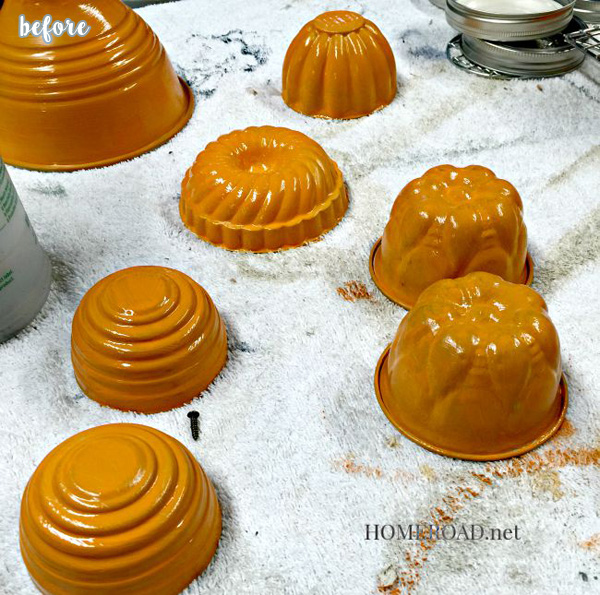
Today, it’s all about the pumpkin.  Get your hands on some orange paint and just about anything can become a pumpkin. Even salad bowls. Believe it.

pumpkin trinket box bowls copy


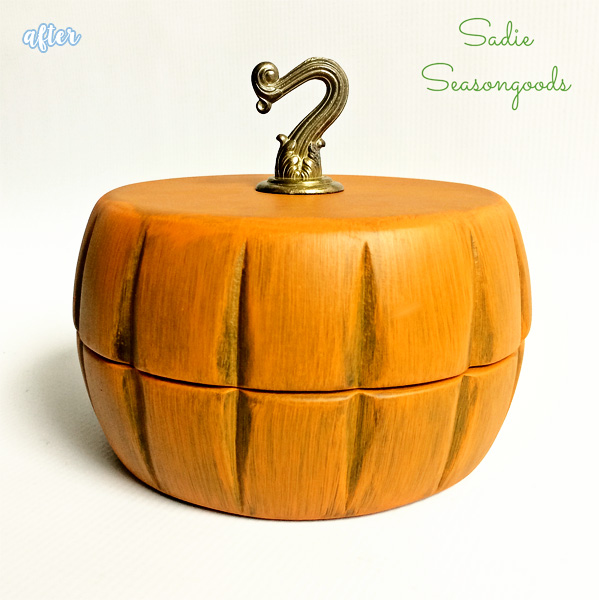
pumpkin trinket box after


Obviously those salad bowls were meant to be pumpkins all along, right? And that hanging hook is the perfect twisty pumpkin stem.  But that’s not all …


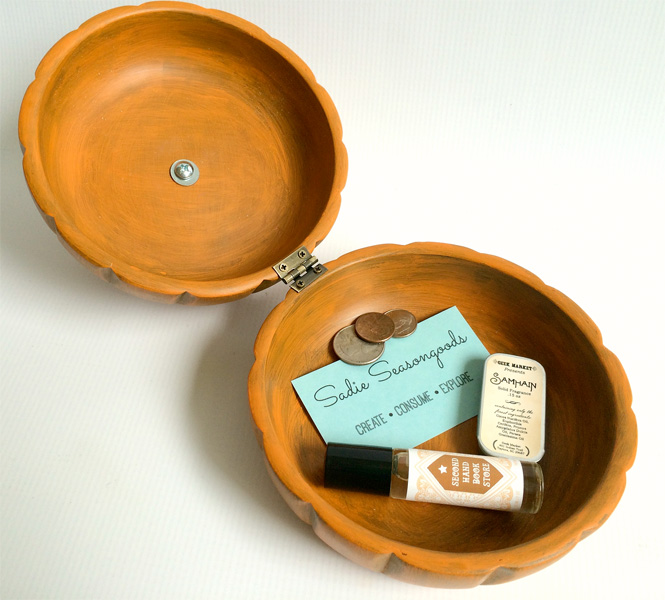
pumpkin trinket box

It’s a trinket box too! I mean, c’mon. What imagination. From Sarah at Sadie Seasongoods.


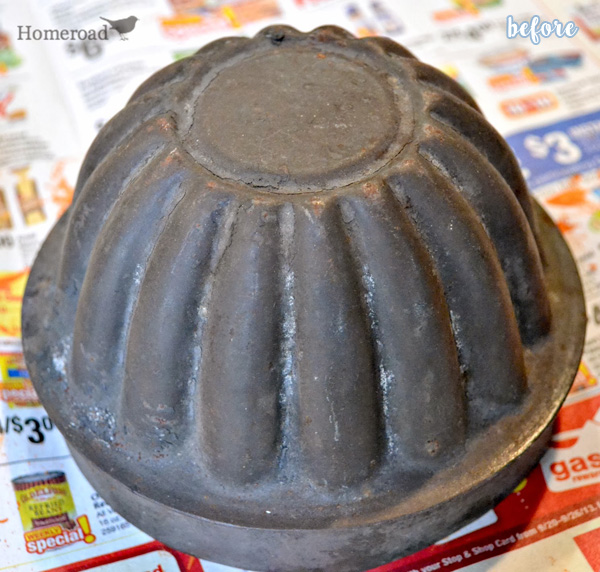
I don’t know what this next item is exactly … an industrial strength jello mold?

Vintage Pumpkin Tin Before

Vintage Pumpkin Tin

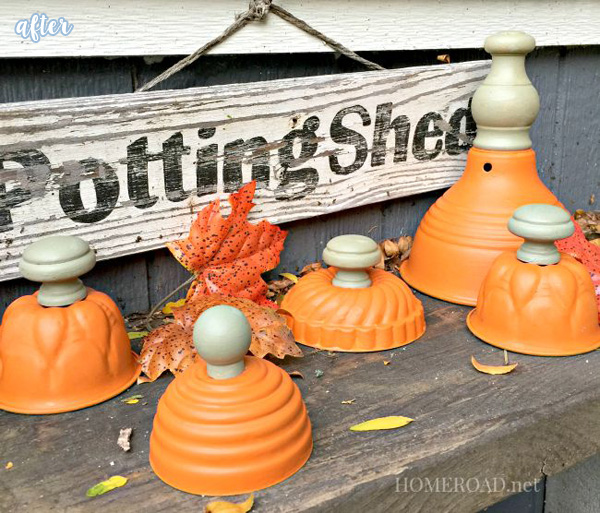
But once again, it was obviously born to be a pumpkin. This comes from Susan at Homeroad, who happens to be a thrifty pumpkin expert and has quite a collection of creations. I believe she calls them ‘Junky Punkys.’

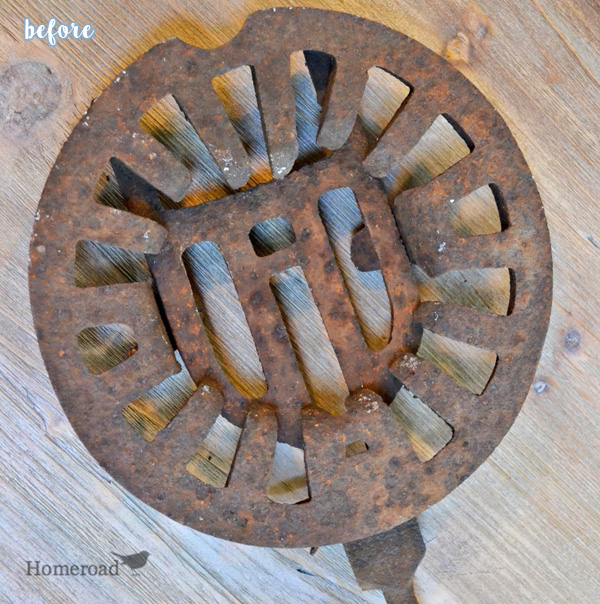
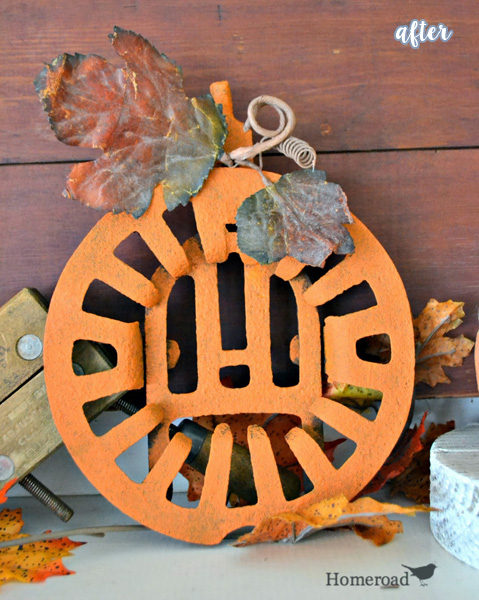
Here’s another:

Grate Pumpkin Before

Grate PumpkinAnd here’s a whole patch!

Painted Pumpkins Before 1

Painted Pumpkins

See Susan’s grate pumpkin here, and the painted pumpkins here. (Is that an old spotlight I spy? Susan, you’re too much!)


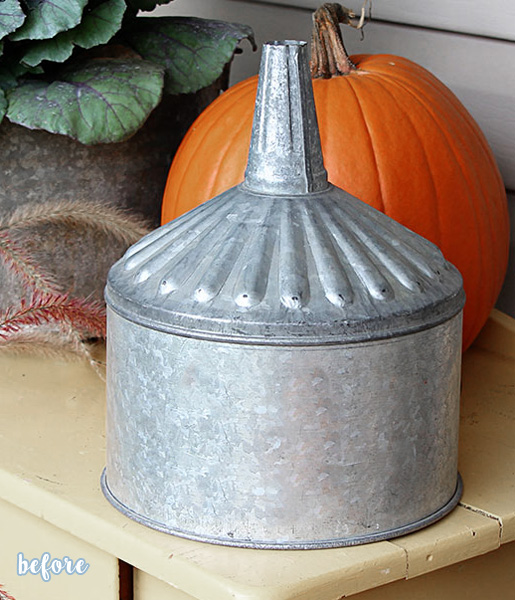
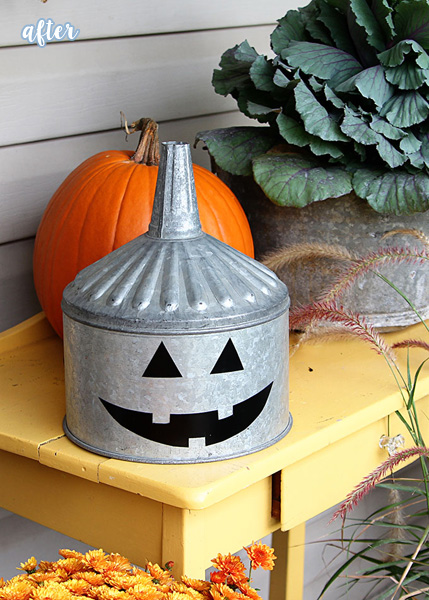
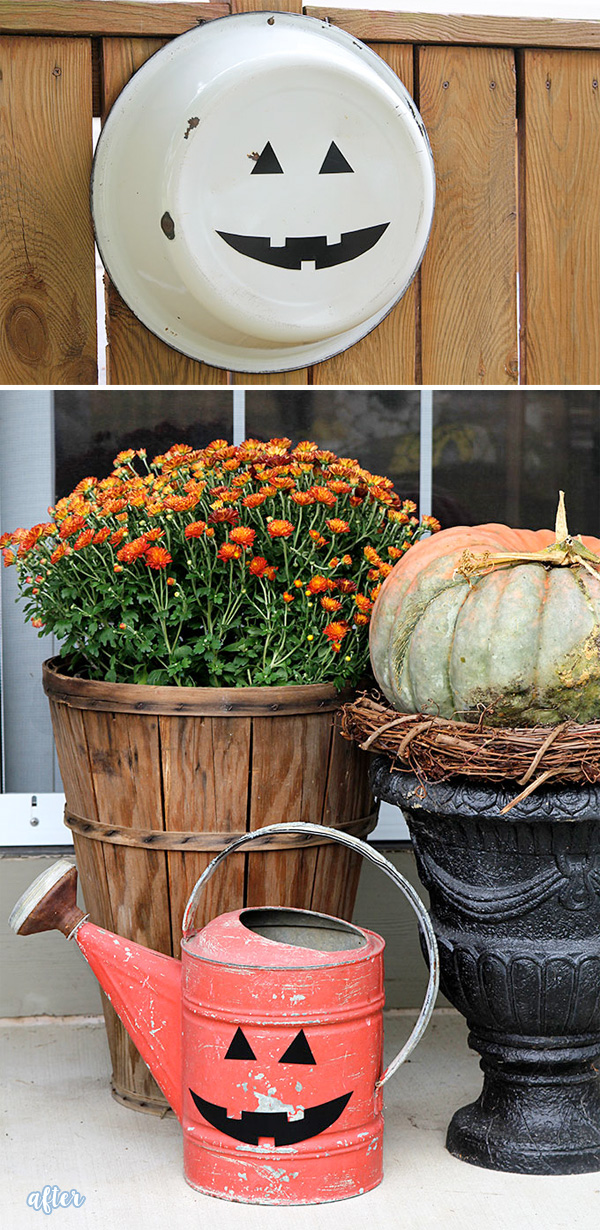
Don’t want to paint? Too messy for you? Not enough time? Then you probably aren’t planning to carve a jack-o-lantern either. That’s messy and time consuming.  Don’t let that stop you. Just get a magnet sheet (like this), cut out some simple face shapes, slap it on something magnet-friendly …

Silver Tin Pumpkin, Bowl before


Silver Tin Pumpkin, Bowl, Watering Can

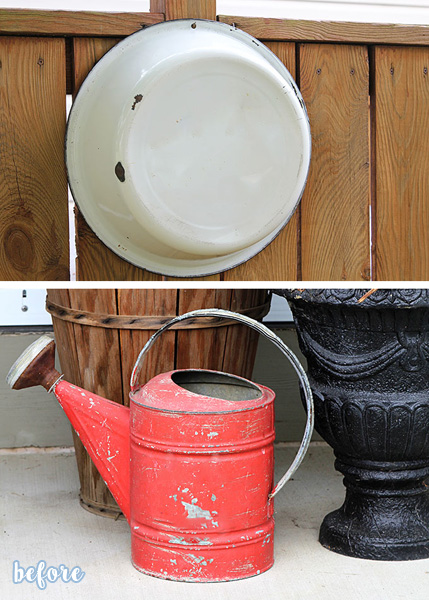
Boo! That’s like, a 10-second craft right there. You might get carried away and make jack-o-lanterns for every magnetic surface in your house. A watering can? A metal bowl? Put a face on it.

Pumpkin Watering Can before

 magnet jackolantern after

All from Pam at House of Hawthornes.


And this last one has been circulating the interwebs for a few years now, but it’s too great not to share.

TV Jack O'Lantern Before

TV Jack O'Lantern

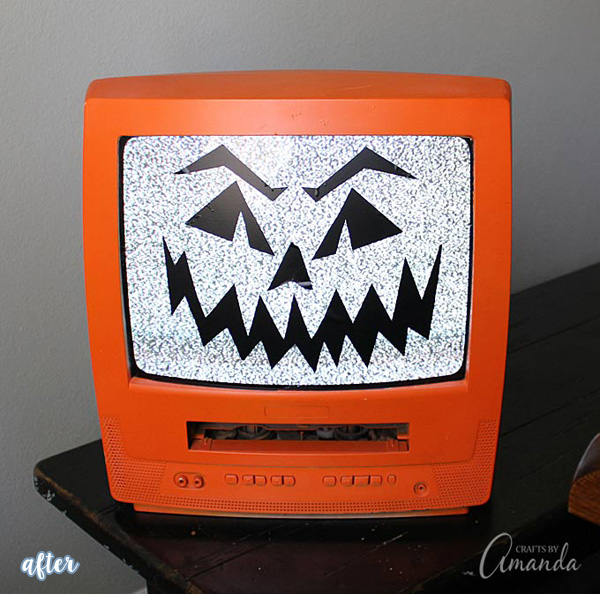
From Amanda at Crafts by Amanda.  SO FUN!

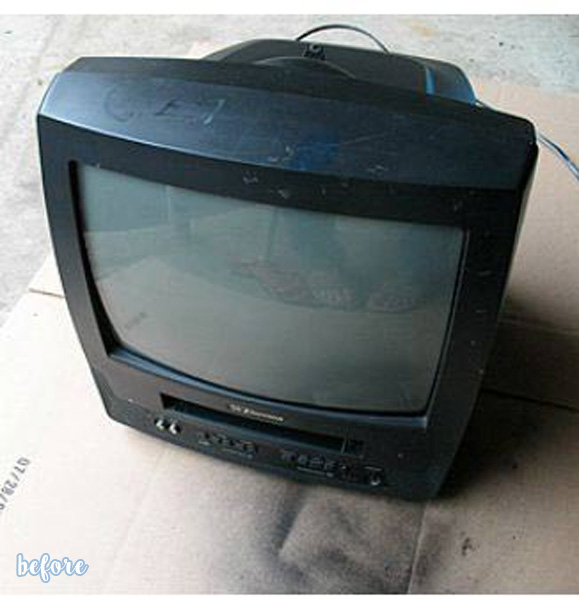
You can find old televisions like this in almost any thrift-store.  My thrift-store can barely give them away, and usually has them priced at literally $1. But with orange spray paint, and some vinyl to make the face, (and as long as the TV works well enough to display static), you’ve got yourself the coolest Halloween decoration on the block.

Wouldn’t it be awesome to make a big display with a whole bunch of them, all different sizes? The only problem would be storing them till next year … no thanks. Hey, I know! Just give them away to trick-or-treaters! Everyone wins, and you save on candy!  Told you this was thrifty.

7 In bathroom/ bedroom

Attic Attack!

Hey party peoples, happy Friday! If your week has left you feeling like you could use a long weekend, then cozy up to this space by Malorie at HomeWork Design Co.

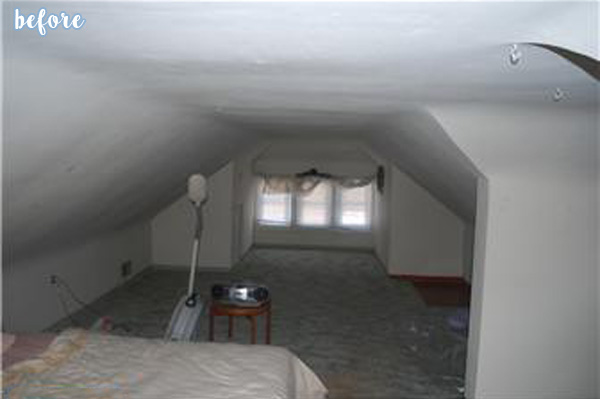
Or if Malorie is busy, or lives too far away, or you don’t actually y’know, know her (awkward), then perhaps you could attack your own attic and make it into a bed-and-breakfast worthy hideaway too. You might need more than a weekend to accomplish such a feat, but I’m sure you’ll thank yourself later.
Light Attic Bedroom Before


Light Attic Bedroom


I just want to kick up my feet and binge watch some Netflix in here, who’s with me?!

What are you watching these days? I could use some recommendations. I’m currently watching Revenge, and I’m only on season one, but I love it so far. I think the best part is that it is set in the beautiful beautiful Hamptons. I especially like to drool over Grayson manor and wish I lived there too, minus all the drama and murderstuff.  Here’s a great look at the set I found from Hooked on Houses.

Anyway!

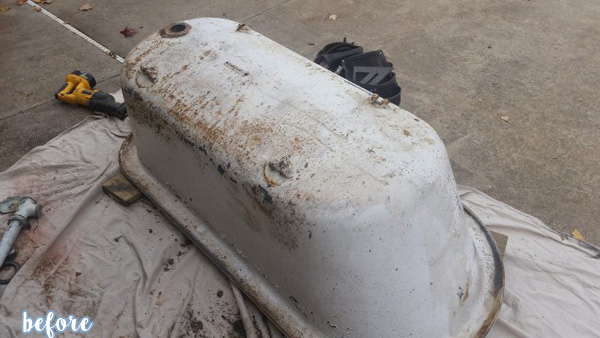
Back to Malorie.  She also took this beaten up tub …

Black Tub Bathroom Before 1

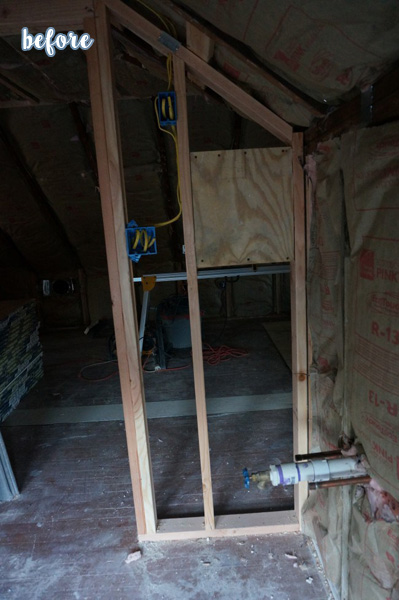
And this dreary corner of the attic …

Black Tub Bathroom Before

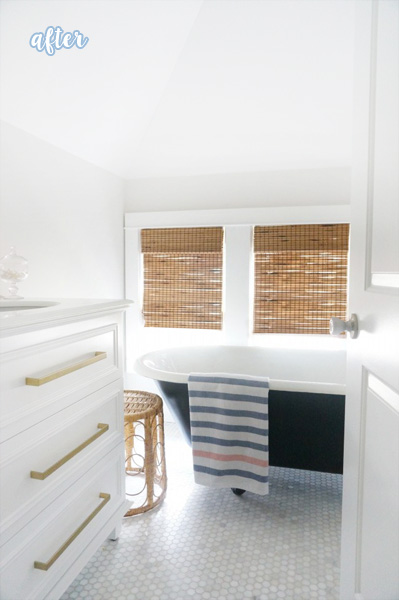
And somehow made a light-filled stunner of a bathroom!

Black Tub BathroomYep, I’d never leave.

Check out more of her bathroom makeover at HomeWork Design Co.

4 In desks/hutches/buffets/ kitchen/dining

Big Whoop, there it is.

Do you ever need an extra hand in the kitchen? Of course you do. Who doesn’t? Sure, you could ask your family to stop what they’re doing and get their behinds in the kitchen to help out – and  deal with their inevitable whining and dramatics – OR, you could just ask your old furniture.

Oh … it hasn’t occurred to you to recruit old furniture into the kitchen? Don’t worry, it never dawned on me either.

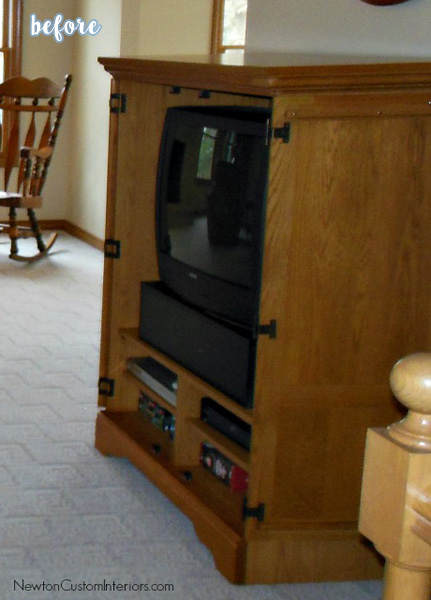
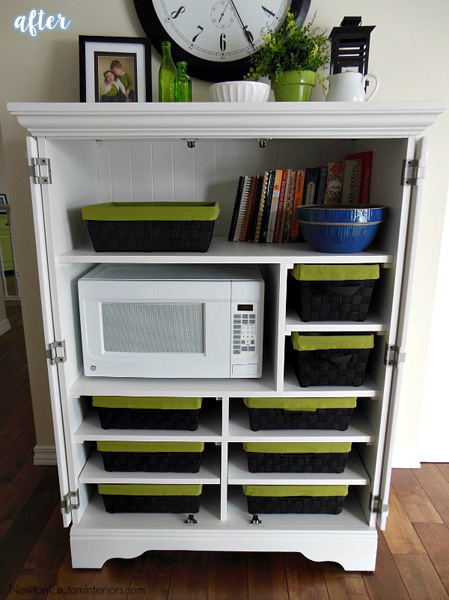
But Ann at Newton Custom Interiors did exactly that when she turned this boxy and outdated entertainment center into a microwave cabinet.

White Microwave Cabinet Before


White Microwave Cabinet

Think of all the ways you could configure this: coffee bar, breakfast pantry, lunch packing station, etc., etc.  Then you can close the doors and keep everything out of sight, and amaze everyone in town with your stealthy supply of surprise storage!


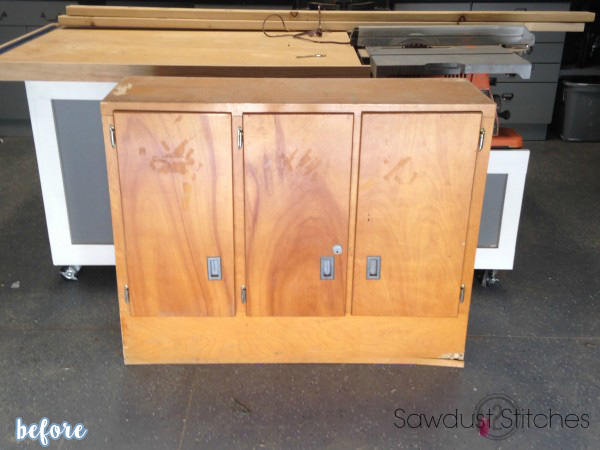
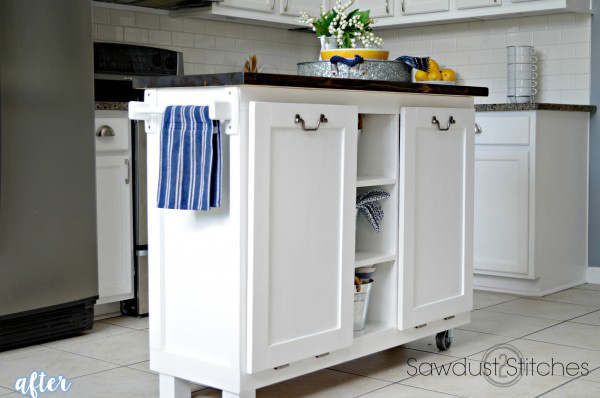
Next, Corey found this set of cabinets at a yard sale for $5. “That’s nice,” you are thinking “but most kitchens already come with cabinets, so big whoop.”  No, NOT big whoop. Big Whoop! Feast your eyeballz on this:

White Kitchen Island Before

White Kitchen Island

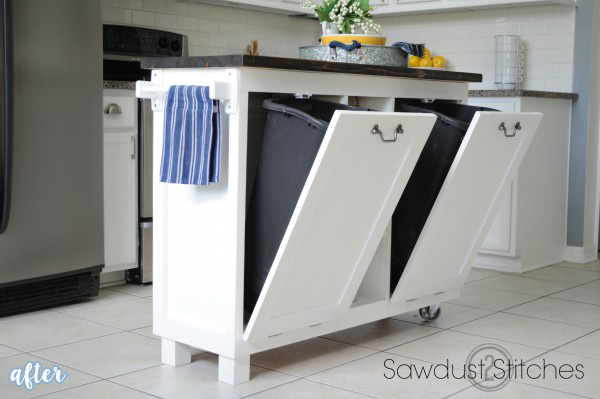
And if that wasn’t enough to earn a legitimate Big Whoop with exclamation mark and jazz hands, then check this out:


White Kitchen Island 1

Not only did Corey create a kitchen island where there wasn’t even one before, she also turned it into a customized garbage can caddy. Smart! See how she did it all on her blog at Sawdust 2 Stitches.

7 In decor/ desks/hutches/buffets

Heart to Art

Have you ever looked at a piece of abstract art and thought, “I could paint that.” Well, what’s stopping you? Maybe you can. Maybe you are the world’s best abstract artist and you don’t even know it yet because you haven’t tried.  I worry about that sometimes. What if I’m the world’s best tightrope walker, or muskrat trainer, or freestyle rapper, and I never know because I’VE NEVER TRIED??

Don’t let that happen to you. First things first, get a muskrat. No, wait, I mean a canvas.

The other day my sister and I each took a blank canvas and the same few colors of paint, and tried our hand at abstract art.  It was crazy how different they both turned out. I will show you mine, when I am happy with it, which is not today. Turns out I might not be the world’s best abstract artist.

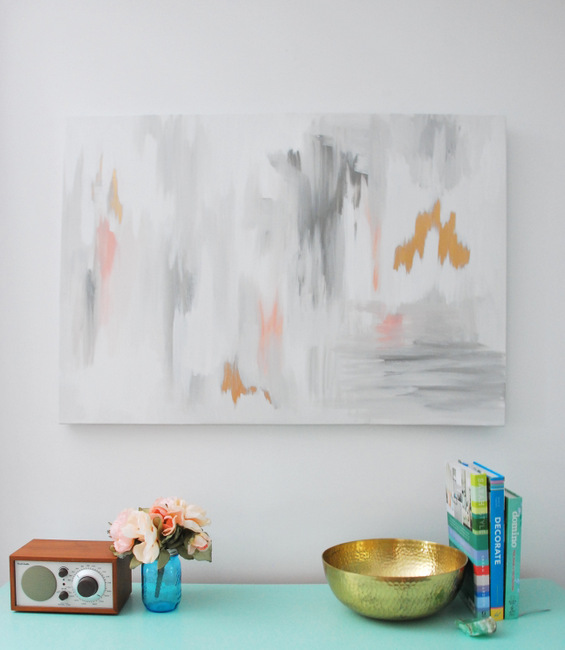
But I love this one from Gemma!

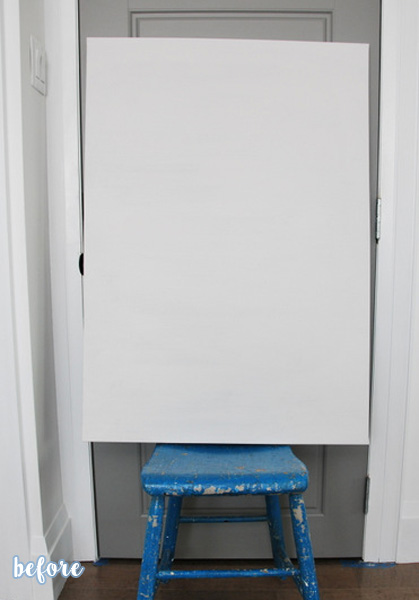
DIY Abstract Artwork Before

DIY Abstract Artwork

Simple and lovely. Just a few shades of gray with touches of pink and gold.  I need to go back and simplify mine, it has about 15 shades of everything and I tried for some soft pink and ended up somewhere in garish hot pink fuchsia town.

See her process at The Sweetest Digs.


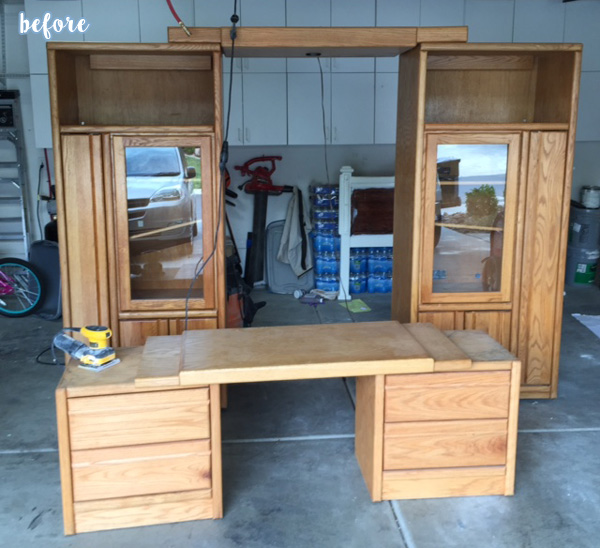
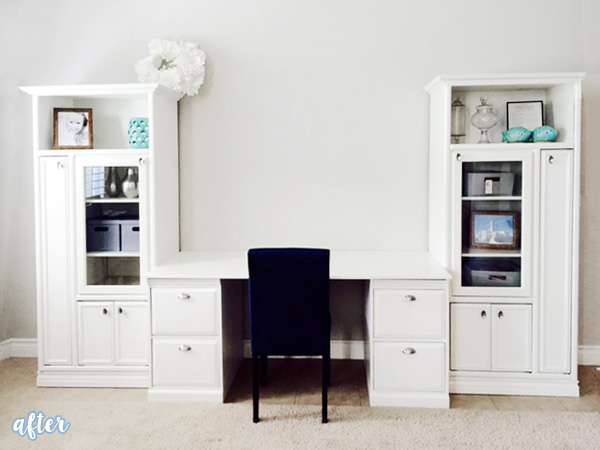
And next, guess what Better After reader Jessica turned this old entertainment unit into?

White Desk Unit Before

White Desk Unit

Did you say a desk? I bet not, because who saw that coming? Not me.

She says “I wanted a Pottery Barn desk unit but was unwilling to part with thousands of dollars for it. I found this unfortunate oak entertainment center for $85 and with lots of blood, sweat and tears, got her done. Three months later. Not pictured in the before picture is a couple of filing cabinets I opted to use instead of the ones that came with it.”

I love it. Great job Jessica! And if you’re wondering what Gemma’s abstract art had to do with Jessica’s desk, and why I shared them in one post, it’s because look how happy they would be together:

White Desk Unit with art
Hmmm, maybe I’m the world’s best matchmaker, what do you think about that? Ha!

Protected By
Shield Security PRO