0

Living Rooms

Kitchens

Furniture

379 In living room

HomeGoods Happy Living Room Makeover

HomeGoods recently challenged me to spread some happiness to someone else as part of their ‘Happiness Happens’ campaign.   I love happiness.  And I love HomeGoods.  Challenge accepted!

I was given a $250 giftcard  and a limited amount of time to spread some cheer, so I called up my friend Charity and asked if my giftcard and I could come jazzify a space in her home.  She said, “Gee, let me thi…SURE!”

Charity claimed that living room was in desperate need of color, so I went over there to take a look.

homegoods living room makeover before

Diagnoses: correct.  Lots of tan. (To be fair, we didn’t attempt to straighten up before taking these pics. In fact, I think I kicked a sleeping person off the couch seconds prior to shooting this one.  Unadulterated before pics, gotta love ’em).

Since I had to stretch such a limited budget in a short time frame, I knew I would need to work with all that tan, not against it.  I couldn’t just go throw a bunch of zany colors in there and hope it would cancel out the brown.

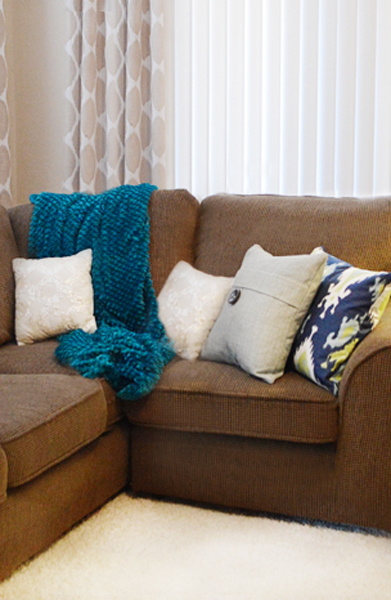
So I thought I’d go for a ‘beachy’ kind of feel, using the tan as a neutral backdrop to bring in a few gentle blues and greens.


home goods pillowsThis cute little pillow reminded me of seashells.

homegoods

A pretty throw for some color and softness, a rug to anchor the space and break up all that tile, some curtains too bring in some pattern.  HomeGoods always has a great selection of curtains, but can I humbly beg for curtain manufacturers to PLEASE start offering them in sizes longer than 84″?  That is the standard length, and it’s just not long enough.  I had to take out the hem to give these a few more inches, and it still didn’t quite touch the floor.


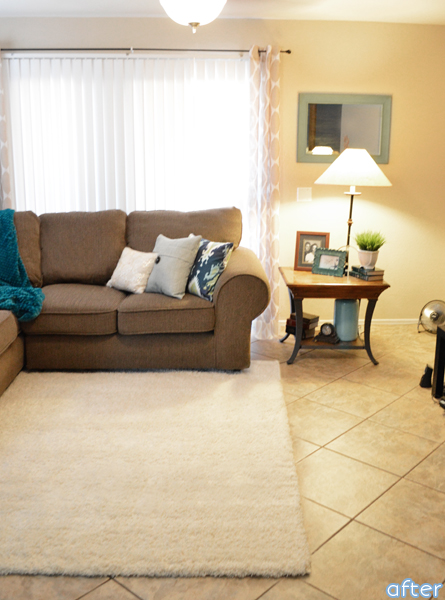
So here’s the full view:

homegoods living room makeover before

homegoods living room makeover after

I would have loved to find a rug with more color, but I was at the mercy of what HomeGoods had in stock that day, so white it is. I love white, and I think it really brightened up the room, so I’m not too worried about it, even if a white rug is not ideal for everyone. Charity has teenage girls, who are slightly different than say, toddler boys, so I think it will be ok, and it’s so nice and fluffy compared to lounging on the tile before.

And speaking of the slippery tile, the sofa used to slide around and smoosh up against the vertical blinds on it before, but the rug keeps it firmly in place now.
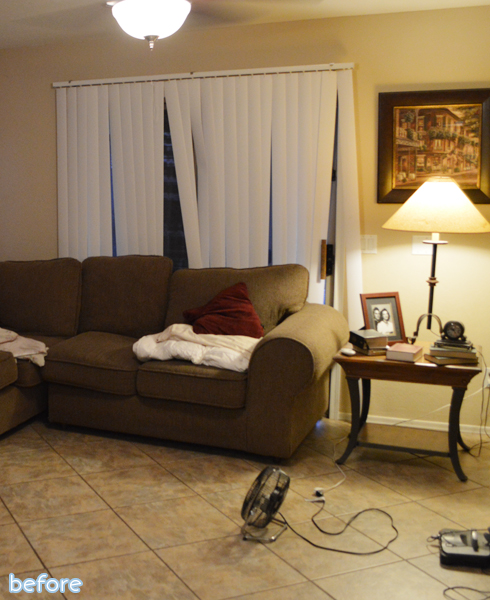
homegoods before

homegoods living room makeover after2

Budget Breakdown:

  • Rug: $99
  • Pillows: $35 (I made the ikat ones myself)
  • Mirror: $39
  • Throw: $15
  • Curtains: $40
  • Accessories: (vase, picture frame) $22

When it came down to it, I came within 69 cents of my budget!  Woohoo! Not a bad change for an afternoon of work, and Charity is super happy with it, so I’m happy too!
homegoods copy

5 In outdoors/ Uncategorized

The Adorable Outdoors

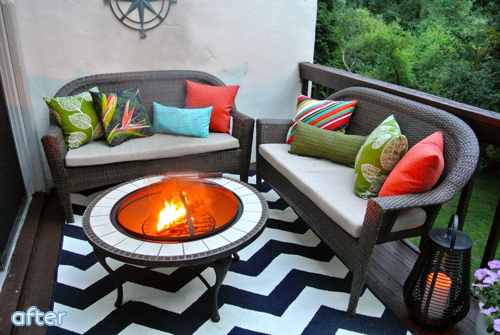
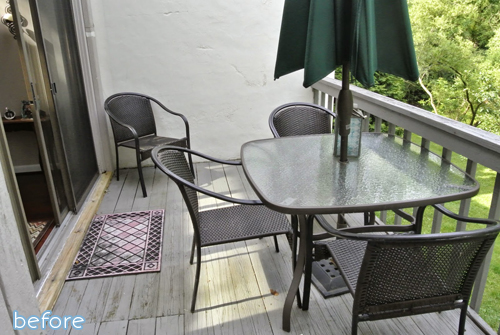
How cute is this deck makeover from Gina? Answer: Way cute.  That is a lot of style and color packed into one small space, and it looks fantastic!

It reminds me ever so slightly of a deck ‘makeover’ we did at our first apartment when we were newlyweds approximately 100 years ago.  Spoiler alert: it was nothing like this.  I’m pretty sure it included a resin bunny sculpture and some dollar store windchimes. I am also 100% sure that took a plastic milk crate, sewed a cover for it out of an old shower curtain and called it a ‘table.’ That’s probably where I set the bunny sculpture. I think I was aiming for ‘outdoorsy.’ Wow.

Go scrub the mental image of that out of your brain by visiting Gina’s lovely blog What Gina Says.

Deck makeover full of color | betterafter.net

Deck makeover full of color | betterafter.net

PS: I get asked this question a lot, and it always surprises me that so many people don’t know, so I thought I’d answer it here.   Question: I have a before and after to share, do you take submissions?  Answer: YES!  Absolutely! Send them my way at betterafter(at)live.com. No need to have a blog or a link, just some nice clear pictures is all I need!

7 In tables/dressers

Time Release

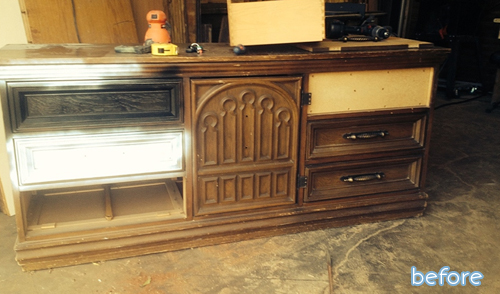
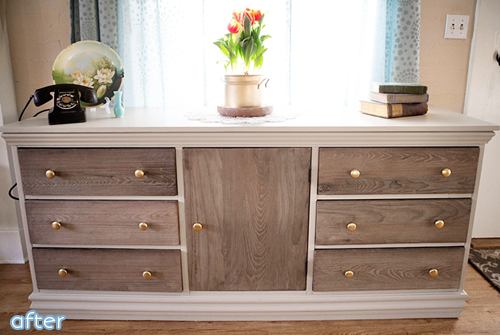
This dresser had some good things going for it, and a few things that should be boxed up in a time machine and sent back to whatever era they came from. Unfortunately, Jen doesn’t have a functioning time machine, but she does have a handy husband, (which is even better, in my book!) who helped her turn it into the stunner it is today.

They freed it from the funky fake plastic inserts that were confining it to the ’70s, and achieved that gray stain with the ol’ vinegar and steel wool trick. I have tried that trick too, but I never get that lovely gray stain! Mine turns everything like, beet red.  I don’t know what I’m doing wrong. I opened a carton of eggs upside down today, so obviously I’m having trouble winning at life lately.

See this lovely dresser and more from Jen at All Things New.

70s to rustic chic dresser makeover |betterafter.net

70s to rustic chic dresser makeover |betterafter.net

10 In other rooms

From Barn to Noble

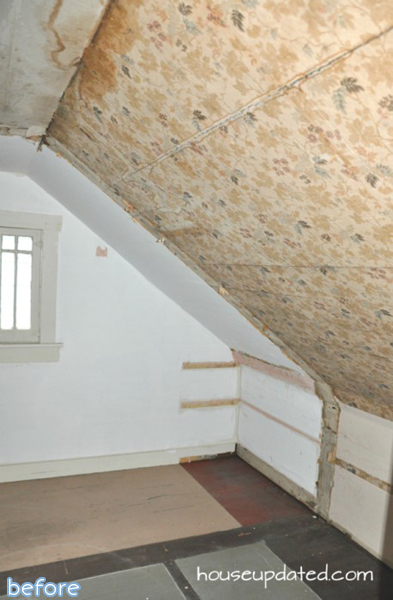
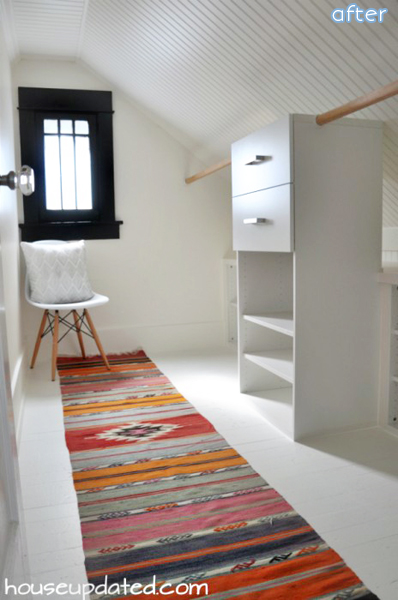
Brit didn’t need a place to hide her kidnapping victims, but her closet said otherwise. That is definitely not what you want your closet to be saying about you.

Hmm, I wonder what my closet would say about me.  Probably “Lindsey, this sparkly pair of knock-off Uggs you wore the entire time you were pregnant is not working for me. Let them go! Let them gooo! Your feet aren’t that fat anymore!!” (My closet is  apparently a cross between Elsa and Tim Gunn).

But that’s silly.  Closets aren’t people.  Except if they were, Brit’s new closet would be that foreign exchange student from Sweden who is five thousand coolness light years ahead of everyone else in school without even trying.

See more on her blog at House Updated. Beadboard closet makeover | betterafter.net


Beadboard closet makeover | betterafter.net

15 In My House

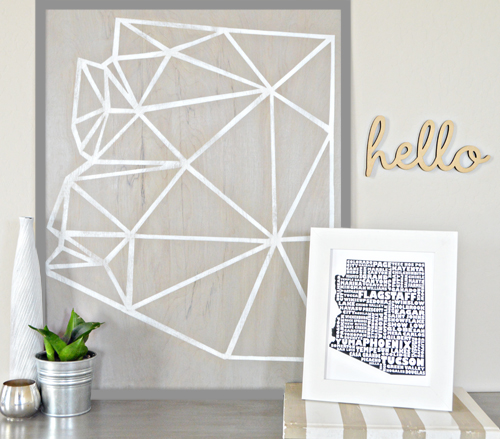
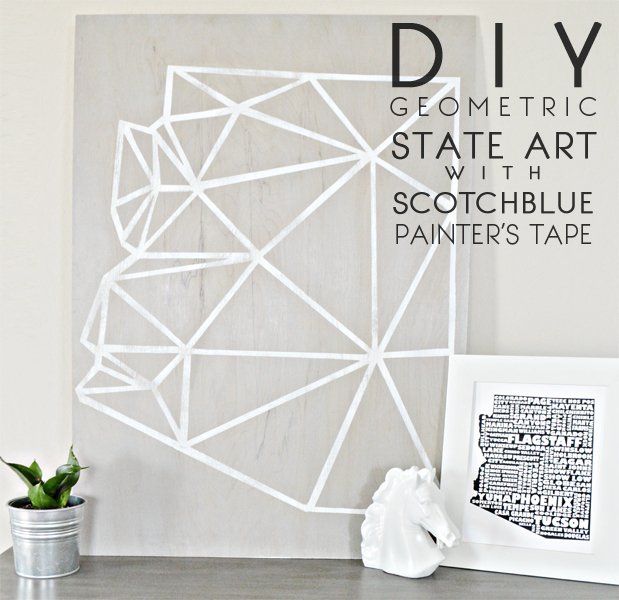
Geometric State Art

>>>I am proud to be a 3M, Behr®, and Wooster® – sponsored blogger, and, as part of my responsibilities, I get the opportunity to evaluate products. Opinions are my own and additional product used in the project were selected by me.

Oh, Arizona.  We’ve had our ups and downs.  I complain about your blazing heat like, all of the time. You can’t seem to keep yourself out of the news.  But you know what AZ?  (Can I call you AZ? I feel like I can). Let me tell you something. There’s no place else I’d rather be.

3m8

Yes, I’m an Arizona girl at heart; born and raised here. And even though summertime for me equals hibernation, I’m proud of this old state. (Ask me to recite some AZ trivia sometime. I know a lot. I’m a big hit at parties).

3M recently challenged me to create and share a summer painting project for the 2014 “Get It, Got It, Go” Summer Blog-Hop with ScotchBlue™ Painter’s Tape and The Home Depot. And since I have plenty of indoor hours to kill, I thought why not make a little homage to my home – for my home!

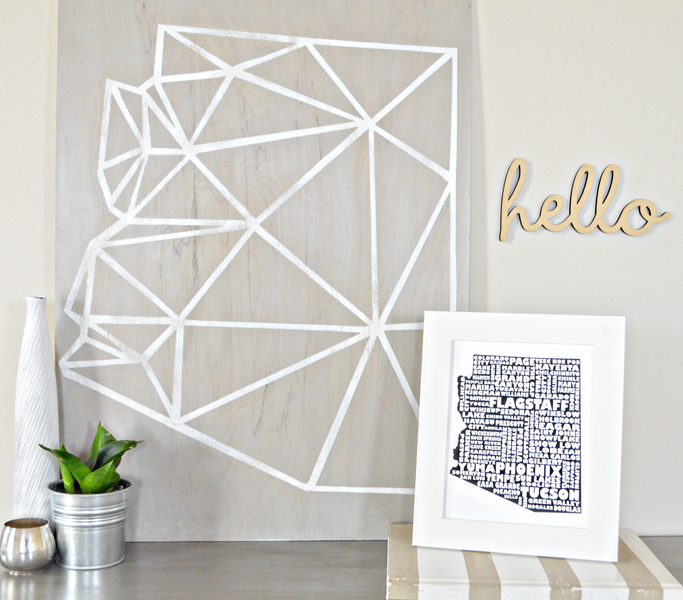
The geometric craze is everywhere these days, and I’m on board.  I mocked up this geometric state design in Photoshop®, and transferred it to my Silhouette to cut it out. But even if you don’t have access to these, there’s no reason you can’t simply cut one out on your own, it’s just a bunch of straight lines!  And even if your state isn’t as attractively-shaped as Arizona (sorry Wyoming), don’t let that stop you, you can still make one too.

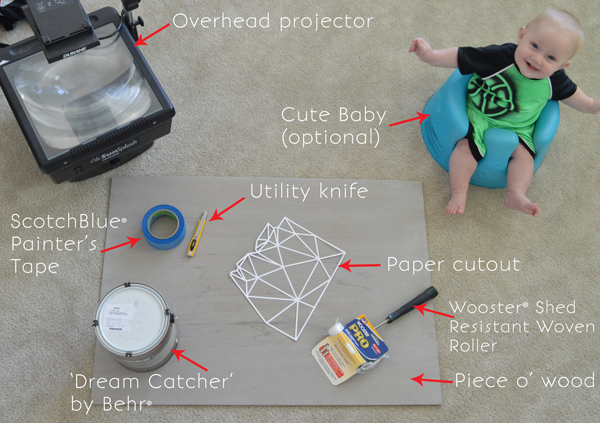
Here’s what I used:DSC_0545 copy copy


The wood is just a piece of underlayment that I got at The Home Depot and stained.  Pros: super light, so it’s easy to hang, and also inexpensive.  Cons: easy to chip the top layer if you press to hard with the knife. Good to know and now you know it.

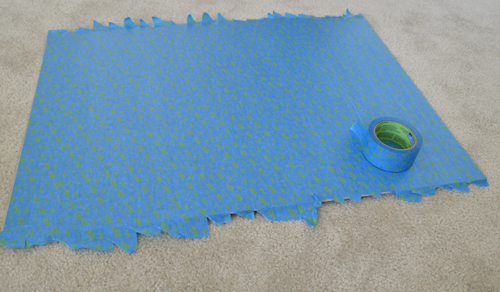
I covered the entire surface with ScotchBlue™ Painter’s Tape Multi-Surface with Advanced Edge-Lock™ Paint Line Protector. Press it down nice and tight!

3m2


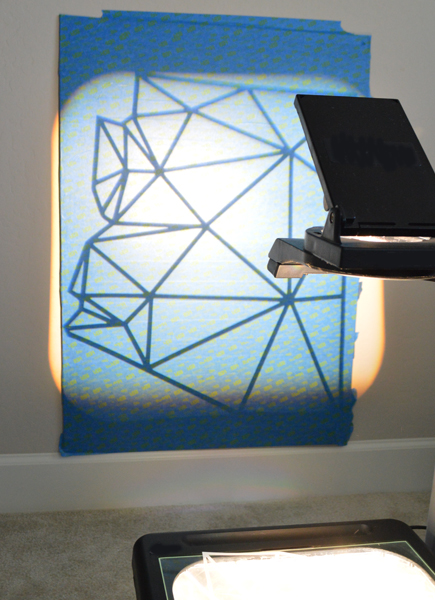
I finally got to drag out the overhead projector I bought from a school surplus sale last year. I knew it would come in handy someday, despite what my husband said!

3m3


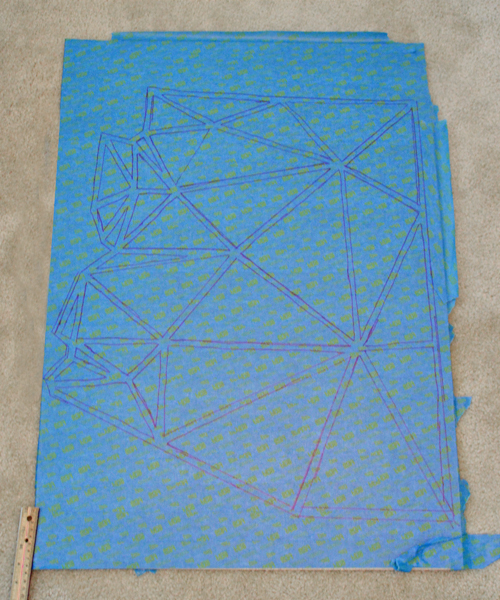
Then, I just traced along the lines.3m4


It’s not perfect, but that’s ok.  I planned to make up for it with the straight edge and the utility knife.  My plan was to remove all the lines and keep the triangles intact, because I wanted the lines white.  So of course, the very first thing I did was cut out and remove the triangles.  Urgh.   3m5


After painstakingly replacing a few triangles, I got myself back on track and cut out all the lines.  A ruler is your best friend during this process.

3m6

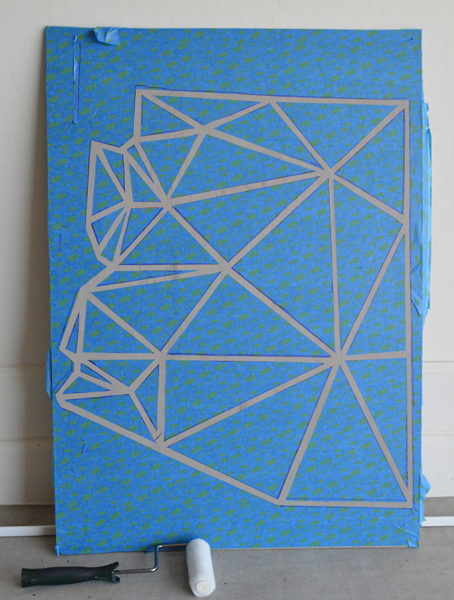
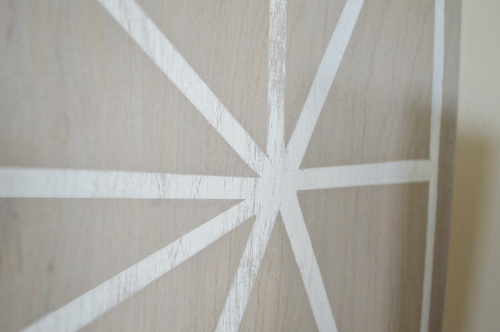
Give the tape one last rub-down to be sure it’s fully adhered to the board, and gently roll on a light (LIGHT!) coat of paint.  This is the Wooster® Shed Resistant Woven Roller, which, if you’ve never used a Wooster® , do yourself a favor and try one out.  You’ll be a believer.  You can do another coat if you want fuller coverage, but I wanted to distress mine, so I removed the tape as soon as the paint was dry to the touch (so like 30 seconds later. Thanks double-triple temperatures! I knew you were good for something!)

3m7

And … tada! It looks so nice with my other Arizona art from Map My State. I think I smell the beginning of a collection …

3m8


I might want to make a little frame for it, what do you think? Frame yes? No?

3mframe


Thanks to 3M™, ScotchBlue™ Painter’s Tape, Behr® & Wooster® for helping make this project happen!

Head over to Centsational Girl to get hoppin’ and see the dozens of other projects my fellow bloggers have come up with:

320 Sycamore: Front Porch Project

Simply Designing: DIY Board & Batten

Brooklyn Limestone: Farmer’s Market Display Stand

Fave Crafts: DIY Aztec Planters

Domestic Imperfection: Rusty Metal Shed Makeover

Studio Pebbles: Faux Frame Modern Art

Whipperberry: BBQ Tool Storage

Dukes & Duchesses: Color Block Umbrella Table

HoneyBear Lane: Patriotic Lanterns

Uncommon Designs: Striped Workbench

Love of Family & Home: Grain Sack Table

3M9

Love The Home Depot? Get exclusive offers and more when you join The Home Depot Consumer Program.


wooster

behr
Get social!
ScotchBlue™ Facebook page
ScotchBlue™ Twitter
ScotchBlue™ Pinterest
The Home Depot Facebook page
The Home Depot Twitter
The Home Depot Pinterest page

23 In other rooms

Coming Clean

Here we are, back to the grind.  It was so much fun torturing your eyeballs for five solid days during the Ugly Lamp Contest last week, but I am also happy to be bringing you something pleasant to look upon today!

And speaking of being back to the grind, it’s a laundry room makeover.  Nothing is grind-ier than laundry day, am I right? Although, I have to tell you, I am pretty stoked that I have recently figured out a laundry system that works for me. Would you like to hear about it? No? Well too bad!  You’re going to hear about it anyway.

So, I was really tired of getting buried under a laundry pile that I could never EVER catch up on. With four kids, it was necessary to do a load a day just to try and maintain the pile, not even defeat it. Ha! It could never be defeated.

Everyone’s clothes went into the same basket, which had to be sorted, then washed, then sorted again into piles when they came out of the dryer, then folded and put away.  But then one day I realized, duh, instead of washing all of our stuff together, how about everyone has their OWN basket?  Now instead of doing endless loads of everyone’s clothes and then sorting them into separate piles, I just do one load per person, then they carry their basket of clean clothes up to their rooms and put them away. (Don’t tell, but I don’t even care if the kids fold their stuff or not.  Just get it in the right drawers!) My husband does his own laundry, which helps a lot, and I also stopped folding things like dishtowels and underwear.  Life is way too short man.  Now I just stick them in the drawers and go! (I do still find joy in folding sheets and towels though; I’m not a total barbarian).

Maybe this system is not news to you at all, but it has saved me SO MUCH TIME. I probably spend 20 minutes a week on laundry now, if that.  Life-changer.

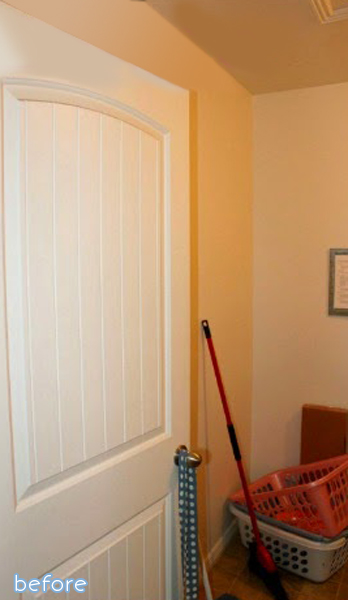
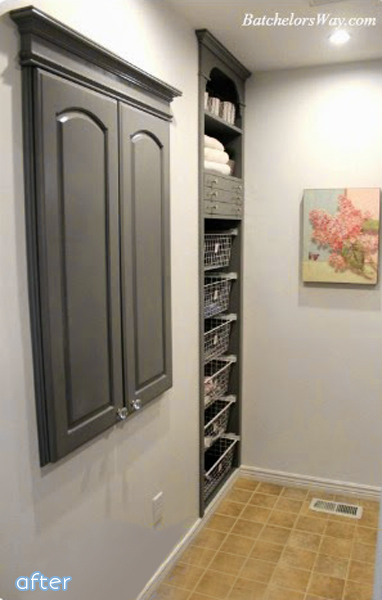
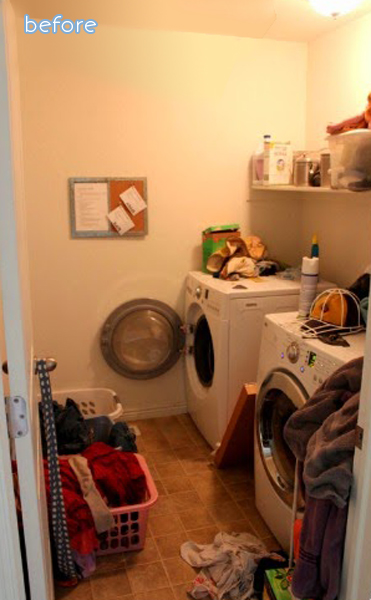
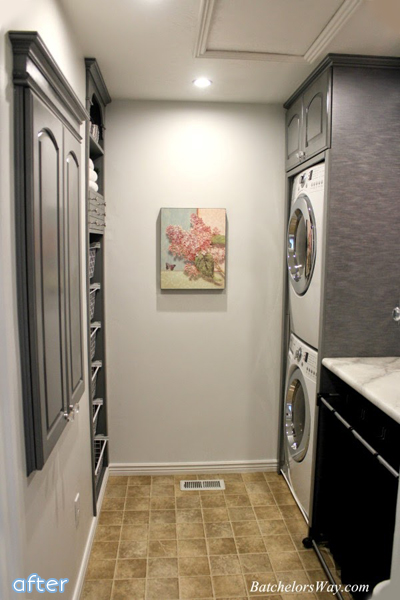
Wow, sorry for that laundry opus.  Are you still with me?  Hope so.  Here’s a fabulous laundry room makeover from Ronda at Batchelors Way. My favorite part: the huge built-in laundry cubby!

gray_laundry_room_makeover beforecopy t gray_laundry_room_makeover after


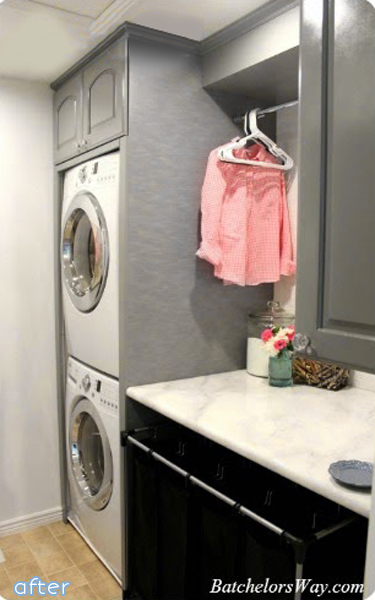
I also love how stacking the machines saves so much room.  I wouldn’t have thought to do that, since there was plenty of room to have them side-by-side, but it just makes sense to save space wherever you can.

gray_laundry_room_makeover copy

gray_laundry_room_makeover2


Remember Ronda’s faux marble countertops?  Still can’t believe that’s hand-painted.gray_laundry_room_makeover copy2

Fabulous job Ronda!

Protected By
Shield Security PRO