0

Living Rooms

Kitchens

Furniture

1 In Uncategorized

12 Days of Christmas Wrap-Up!

Bringing you a little recap of the 12 Days of Christmas blog tour today! If you missed my loose interpretation of 9 Ladies Dancing, (aka Four Stockings Hanging), check that out right heaah. (Yes, I DID just type that in a southern accent, thank you for noticing).

Here are just a few of my favorites, be sure to hop on through and visit everyone on the tour. There’s pictures of Ryan Gosling. (Not that anyone needs an excuse to share pictures of Ryan Gosling, but it actually does make sense. Can you guess what day it was for? Ryan GOSLING? Haha! I’ve said too much).

Enjoy!

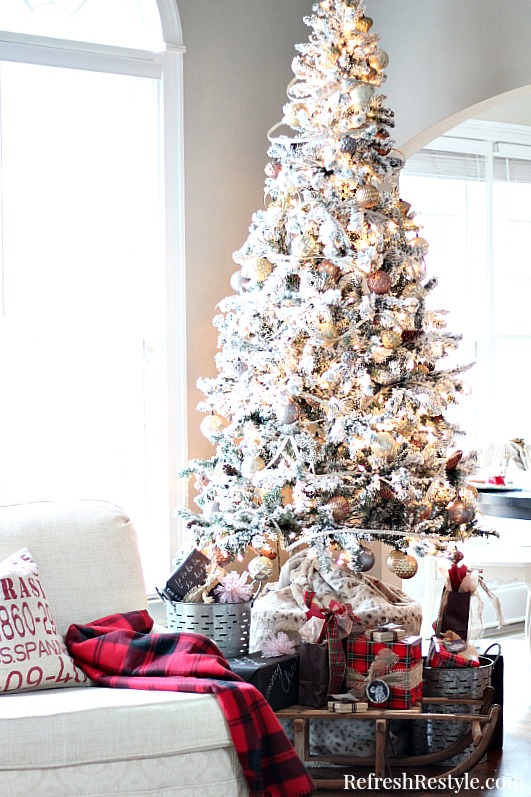
Christmas-Flocked-Tree-with-golds-and-silvers

Gorgeous gold and silver flocked tree via Refresh Restyle


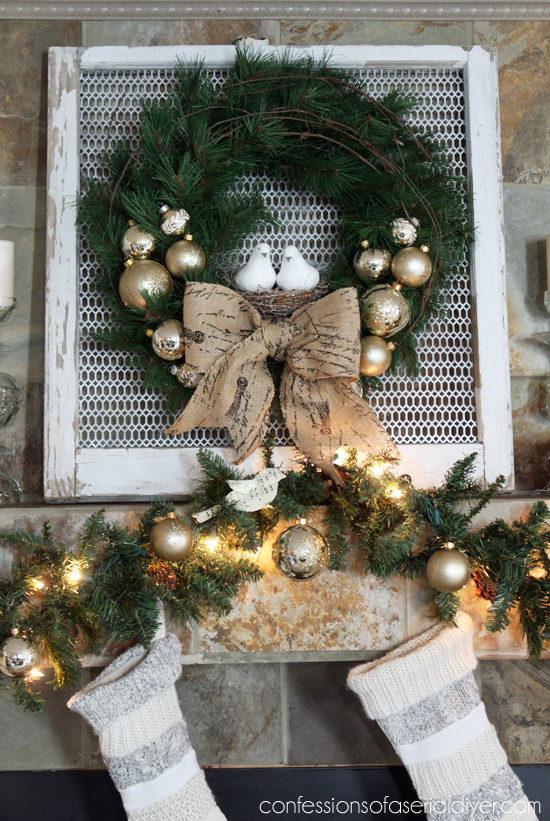
Christmas-Wreath-and-Mantel-16

Two Turtle Doves wreath via Confessions of a Serial Do-it-Yourselfer

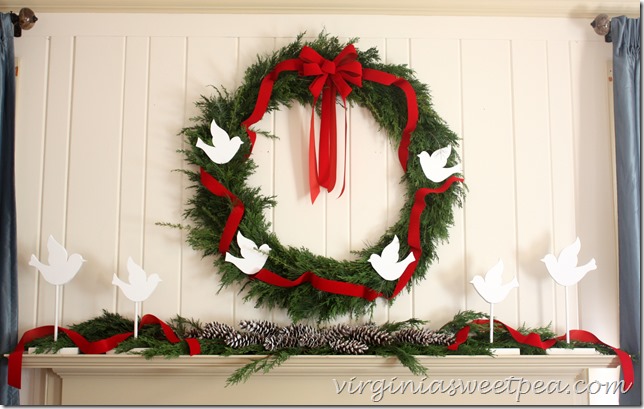
FourCallingBirdsMantel4_thumb

DIY doves via Virginia Sweet Pea


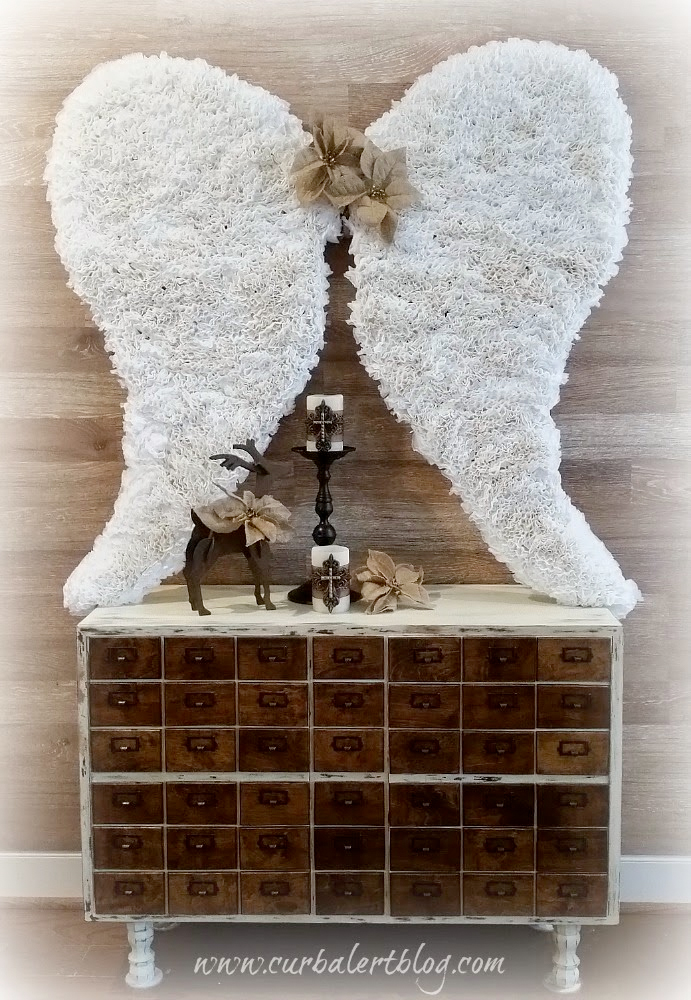
coffee filter angel wings

Coffee filter angel wings via Curb Alert!

{Partridge in a Pear Tree}:  Simply Fresh Vintage        Petticoat Junktion        Snazzy Little Things

{Two Turtle Doves}: Confessions of a Serial Do-it-Yourselfer         Fresh Idea Studio

{Three French Hens}: Country Design Style         DIO Home Improvements         mommy is coocoo

{Four Calling Birds}: Artsy Chicks Rule         Virginia Sweet Pea

{Five Golden Rings}: House on the Way        DIY 180        Restoration Redoux

{Six Geese-a-Laying}: Postcards from the Ridge        Farm Fresh Vintage Finds

{Seven Swans a Swimming}: Curb Alert!        Cupcakes and Crinoline

{Eight Maids a Milking}: Our Southern Home

{Nine Ladies Dancing}: Better After        Rhapsody in Rooms

{Ten Lords a Leaping}: The Endearing Home

{Eleven Pipers Piping}: Refresh Restyle        Lilacs and Longhorns        Imparting Grace

{Twelve Drummers Drumming}: What Meegan Makes        Mrs. Hines Class


PS: If your name is Kathryn, and your email address begins with the letters LAU, please check your inbox, you have won the $100 giveaway to Linens & Boxwoods!


39 In My House

12 Days of Christmas

I was invited to join a “12 Days of Christmas” blog tour, and would you believe it, it’s my first blog tour ever! I feel like one of the cool kids!

If you’re unfamiliar, a blog tour is when a group of bloggers get together (virtually) and share something on their blogs that focuses on the same theme.  Then you, dear reader, get to hop around from blog to blog and check out all that hot bloggin’ goodness.

What fun! Let’s play.

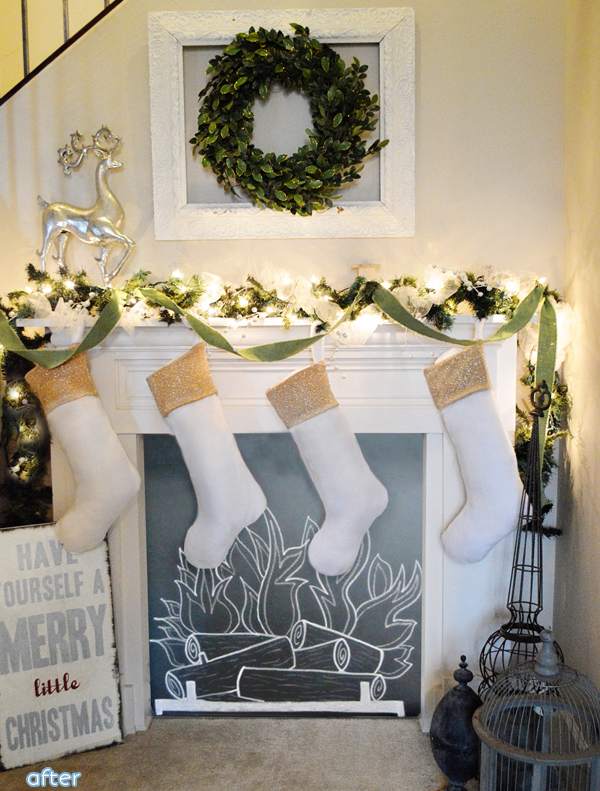
Our theme is the 12 Days of Christmas, and lucky me, I got “Nine Ladies Dancing.”  I didn’t feel like festooning my tree in ballerinas, so I loosely interpreted it to include stockings, because feet equal dancing, and yeah.

Let’s back up and look at the whole scene. Here’s what I started with.  It’s a little sad.
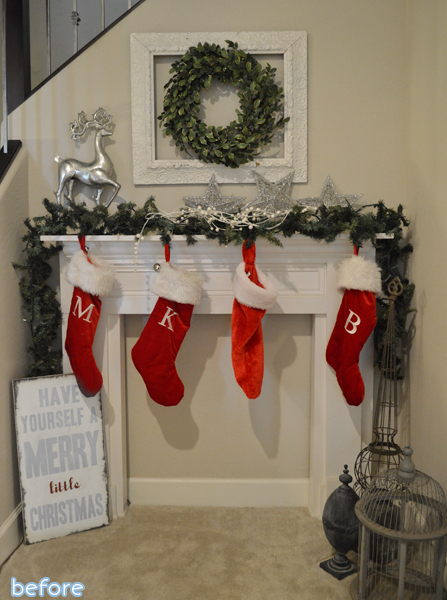
christmas mantle makeover before


Here’s where I ended up:

christmas mantle after copy

What a difference Christmas lights make, eh? And also, other things!

I made that fake mantle a few years ago, and have been meaning to put a chalkboard insert into it forever.  Actually to be honest, my plan was to take a log and slice it into many slices and attach those slices onto the board so it looked much like this, but come to find out, trying to slice a log with a circular saw is a real dumb idea.  So until I can borrow a chainsaw or something, that idea will have to wait. (In even more shameful honesty, I also photoshopped that chalk fire, because I didn’t like how mine looked). (Just keeping it real). (Real fake).

Annnyway, the garland got fluffed up with some glitter tulle (more on that in a minute!) and cloth ribbon.

Those old stockings had to go. I’ve phased out the red in my decor over the last few years, so they just looked out of place. And my sweet baby boy who is celebrating his first Christmas this year didn’t even have a matching one.  His was the weirdo one in the middle.

So I whipped up a few new ones! I love this fluffy white fabric, and don’t even get me started on the gold glitter fabric. It was pretty easy; I’m not much of a sewer, so any beginner could figure it out too.

Here’s a very basic tutorial.

Step one: make these things:
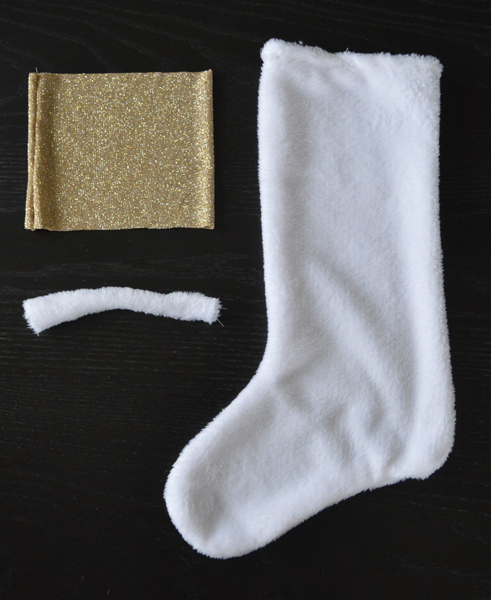
how to make a christmas stocking


Very simple.  I just cut apart of one our old stockings to use as a pattern for the new ones.  Eyeballed how much gold I wanted at the top and made a loop our of that lightly wider than the stocking.  I also made a little loop for hanging.

Next, turn the stocking and top part inside out.
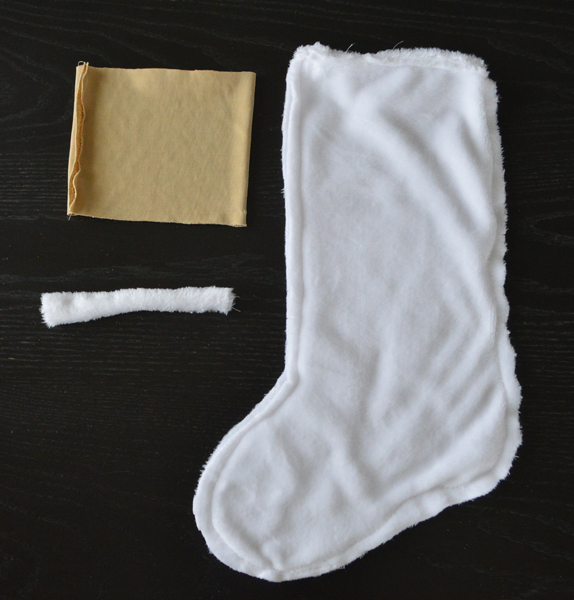
how to make a christmast stocking step two


Slip the stocking inside the top and line up the top edges.  Pin the hanging loop upside down in between the top and the stocking, NOT inside the stocking, (even if your brain tells you it makes sense, you will finally figure out after about seventeen tries of doing it wrong that that way is wrong. Or maybe that’s just me). In any case, I’ve made this diagram so you don’t screw it up. Also, make sure you sew it to the heel side, not the toe side.  Ask me how I know.
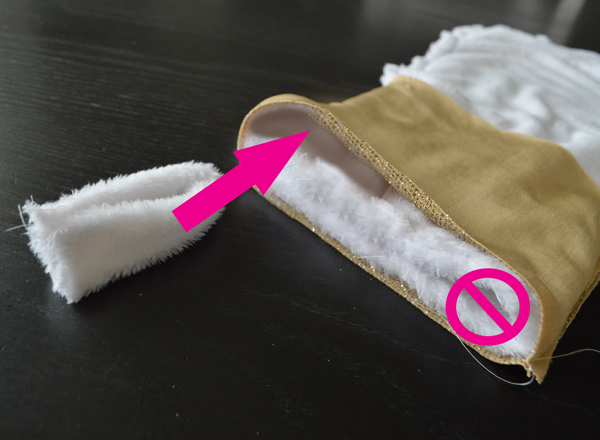
adding a loop to the stocking


Stitch around the top, flip it all right-side-out, and that’s it!

gold and white christmas stockings


I also discovered the magic and wonder of tulle garland.  Did you know about this? Why didn’t you tell me sooner?? I thought we were friends. But it’s Christmastime, so I’ll forgive you.

Oh boy, this stuff is great. SO SO easy.  And it cost me ONE dollar!

DID YOU HEAR ME? ONE DOLLAR!
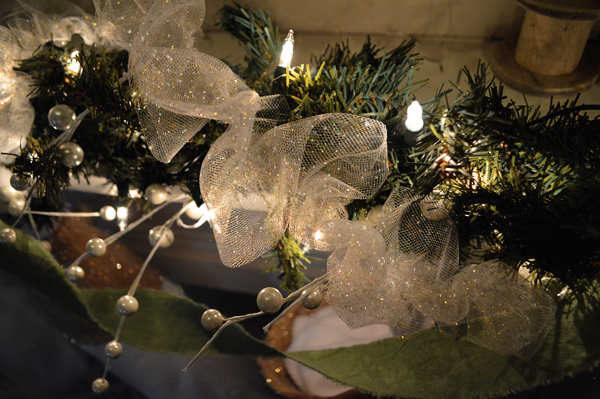
 

glitter tulle christmas garland

I found a 10-yard roll of glitter tulle at Walmart for $1.

I folded it in half and stitched the entire length of it with elastic thread in my bobbin.

DONE.
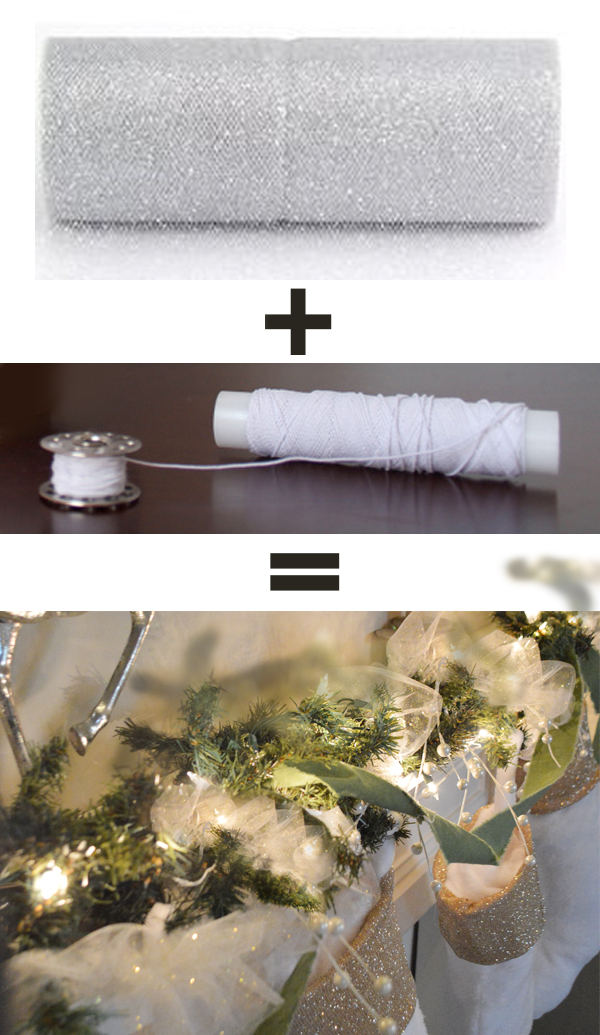
 

how to make tulle garland

You could also use a ruffle-foot if you have one, (which I don’t), but the elastic thread is preeeeety darn easy.  I will probably be making much much more.  Next time, I don’t think I’ll even bother folding it in half, I’ll just stitch right down the center which should result in even puffier garland!

Also, tulle is totally dancey. Theme acheived!

~~~~~~~~~~~~~~~~~~~

OK, if you want to continue on the tour, check out these other lovely ladies!

12 Days of Christmas Tour

{Partridge in a Pear Tree}: Simply Fresh Vintage  ~  Petticoat Junktion  ~  Snazzy Little Things

{Two Turtle Doves}: Confessions of a Serial Do-it-Yourselfer  ~  Fresh Idea Studio

{Three French Hens}: Country Design Style  ~  DIO Home Improvements  ~  mommy is coocoo

{Four Calling Birds}: Artsy Chicks Rule  ~  Virginia Sweet Pea

{Five Golden Rings}: House on the Way ~  DIY 180 ~  Restoration Redoux

{Six Geese-a-Laying}:  Postcards from the Ridge ~  Farm Fresh Vintage Finds

{Seven Swans a Swimming}:  Curb Alert! ~  Cupcakes and Crinoline

{Eight Maids a Milking}: Our Southern Home

12 Days of Christmas Blog Tour button

11 In innovative idea/ miscellaneous/ tables/dressers

Chest Bumps

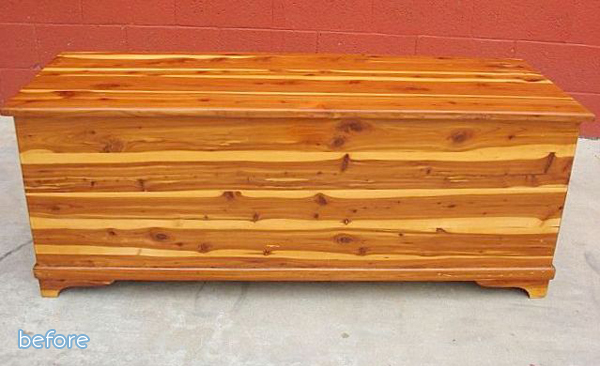
Sweet tarnation, this before chest is giving me the sweats.  If you’re new here, you may not know that I have a mild phobia of knotty wood. I’m shuddering just looking at it! Quick, let’s scroll down to the after.


wood chest before


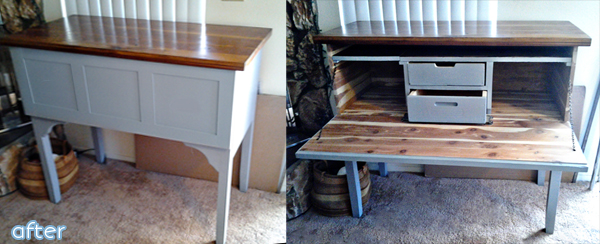
Wood Chest - to - Gray Buffet - Makeover | betterafter.net

Phew.  This I can handle. Better After reader Angi received this chest from a friend who was about to toss it.  Who can turn down orphan furniture? Not our girl Angi! Problem was, she didn’t need another chest.  But she realized with a few modifications, it would make a perfect buffet for holding linens and tablewares in her dining room.

I’m including her process here, since she doesn’t have a blog.  (PS: did you know you can always send me your makeover submissions, whether you’re blogger or not? I’d love to see them! Shoot me an email at betterafter@live(dot)com).

Angi says:

  • I removed the top and stripped off all the finish. I soaked in a bottle of mineral oil and then used 3 coats of Watco Butcher Block to re-seal and finish the top, lightly sanding in between. I wanted to be able to use the top for food prep.
  • I also wanted to be able to access the buffet from the top and from the front. I had to cut the front off the chest, and shorten the length by 1 inch so the front would rest in front instead of inside. I attached it with some cabinet hinges so it would lie flat when opened for additional surface work area.I built the inside from another old cedar chest, and created drawers from wine boxes.
  • I added legs to bring it up to a height I liked and tapered the legs to mimic other mission/shaker pieces I have. I also added the framework to the front.

Wow!


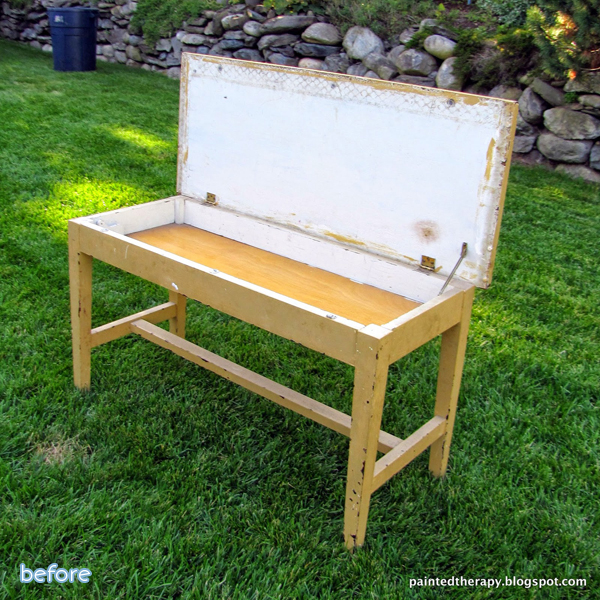
This makeover also started life out differently, first as a piano bench.  What good is a piano bench with no piano?  Well, it’s actually perfect for when I play my air piano, but I haven’t done that in years. I wish I would have stuck with it. I could be playing at air Carnegie Hall right now.

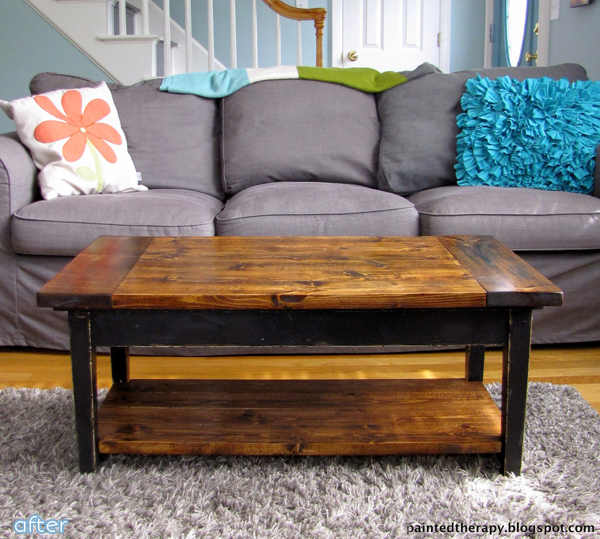
But regrets aside, this bench is still serving a functional purpose, now as a distressed coffee table.

Debbie didn’t mess with much, just shortened the legs and built a new top right on top of the old top, hip hop ya don’t stop. She also added a shelf on the bottom for extra storage, and since it still opens up, there’s storage a-plenty.  Can’t ever have enough of that.  Check it out on her blog Painted Therapy.


piano bench before


Wood - Stained  - Top - Piano to Coffee Table - Makeover | betterafter.net


11 In innovative idea/ kitchen/dining/ lighting

Fixture Fixer

If the Ugly Lamp Contest has taught us anything over the years, it’s that just about anything on this earth can be made into a lamp. Also, that there are many, many horrible lamps.

But today I present to you some light fixtures that are neither ugly nor horrible, but unexpected and fun! Wheee!

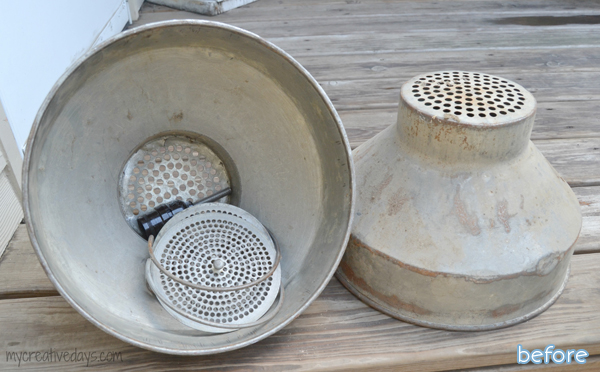
Lindsay recently created some DIY pendants out of … these things:

wood light fixture before

What are these things? No one knows. Farm-grade colanders? We’ll go with that.

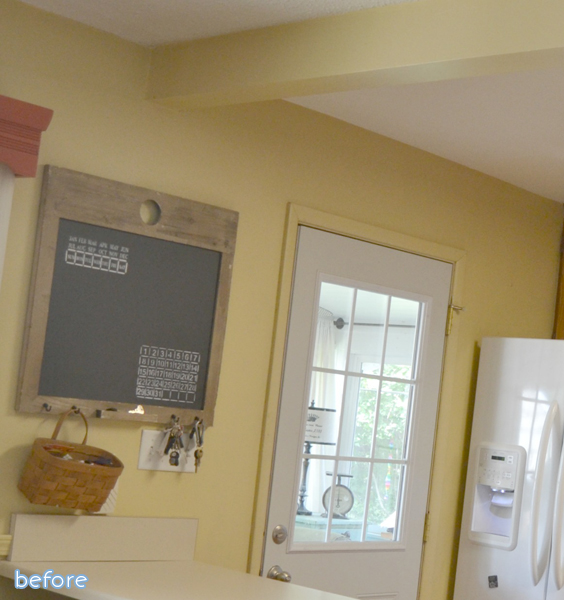
Armed with her galvanized colanders and a few other supplies, she took this odd and awkward area of her kitchen ceiling and made …

wood light fixture room before
Wood Beam - Light Fixture - Makeover |betterafter.net…this!

She built a fake-front around the existing beam with stained planks of wood, which not only bulked it up to make it look much more substantial, they were perfect for hiding the wiring of her fancy new lights.  So cool!

See all the details on her blog at My Creative Days.

PS: Grand prize goes to the first person who can correctly identify what those things are.

PPS: Grand prize is a virtual high-five.


~ Have you entered the Linen & Boxwoods giveaway? $100 to spend, easy entry! ~

6 In tables/dressers

Set in Stains

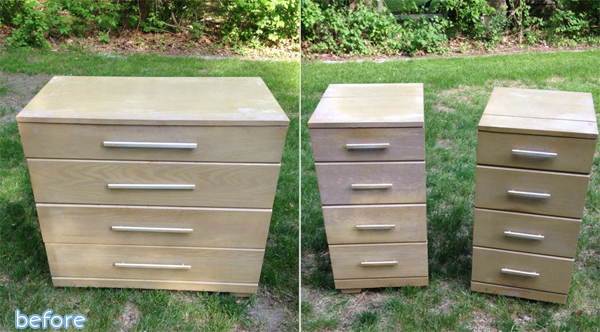
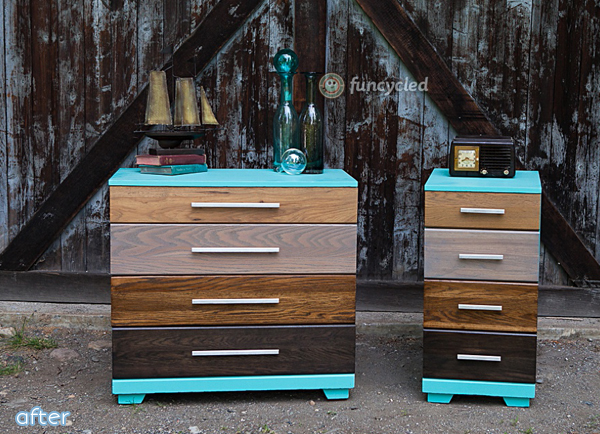
Pop quiz time! Let’s say you restore furniture for a living.  A client comes to you asking for a bright, modern makeover on this set of oak dressers.  You want to give her what she asks for, but you can’t stand the thought of covering up all that beautiful wood grain. Do you:

A. Paint it. Give the client what she wants.

B. Stain it. Insist that she doesn’t know what she wants.

C. Quit the restoring furniture business.  Go get a job at the zoo.

D. Work your makeover magic mojo and make everyone happy.

I’ll bet you can guess what Sarah at FunCycled did …


plain dressers before

Stained - Ombre - Dressers - Aqua - Makeover | Betterafter.netOf course she picked D! I give it an A+.

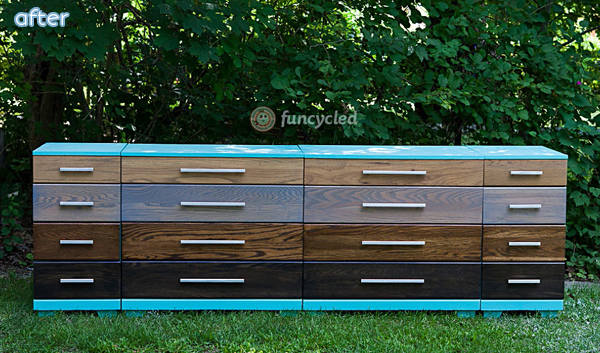
Sarah and her client were thrilled with the results of this ombre stain and teal treatment.  And check this out:

Stained - Ombre - Dressers - Aqua - Makeover | Betterafter.net

Now that’s just cool. I feel the need to go find a bunch of matching dresser sets today.

7 In other rooms

Classy Cave, Man.

Well hello friend. How was your Thanksgiving? Full of family and food and more food? I hope so.

We went to Matt’s sister’s home, in a tiny town in California called Ramona.  Ever heard of it? I hadn’t! It is so small they don’t even have a grocery store.  I had to buy a few last minute supplies at the only store in town, the liquor store. Did you know you can buy pie at a liquor store? I did not, but now I do!

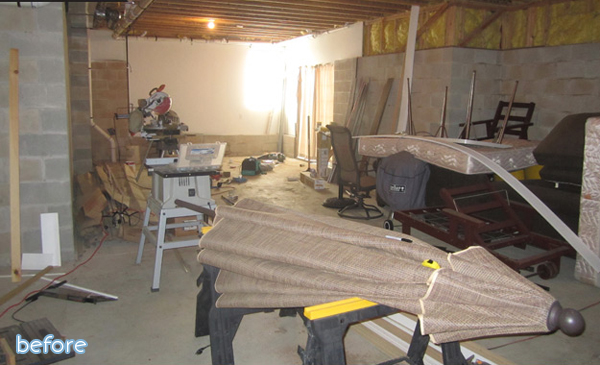
Speaking of liquor, you may take a look at this makeover and think you are looking at a hip new neighborhood bar. Nope. This room belongs to Frank, a guy who isn’t afraid to tackle big ideas, like say, building a posh pub-style mancave in his basement.

His over-the-top escapades over the years have earned him the nickname “Too-Far Frank,” which made naming this space pretty easy.  Welcome to the Too-Far Bar!

Much more to see on his sister-in-law Tara’s blog Spot of Tea Designs.


brick basement before 


Pub Style  - Man Cave -  Makeover | betterafter.net

Don’t forget to enter the $100 Linens & Boxwoods giveaway! Entry is easy!

Check out the super easy customizable Christmas gift idea I shared last week in case you missed it!

Protected By
Shield Security PRO