0

Living Rooms

Kitchens

Furniture

6 In decor

Cover to Cover

You know how they say you shouldn’t judge a book by its cover? Or how they also say it’s not what’s on the outside, but on the inside that counts? Well honey, ‘they’ don’t have a book called “Beautiful Bones Without Hormones” which features photos of bone slices with osteoporosis on the cover, and I do. You can imagine for yourself what’s on the inside.

Why do I even own such a book in my collection, you ask? Because hey, sometimes it’s OK to only care about the outward appearance of something. I wanted to make a pretty book, so I found that particularly unwanted tome at the thrift-store and gave it a makeover!  You can see how that little project turned out on my post about printable book covers.  (I’m no stranger to making over books, my altered Halloween book tutorial is also my most popular post year-round).

Anyway, not all books are pretty, and that’s OK. And if you want to make your books look pretty, that’s OK too! Here are a couple of ideas for you.

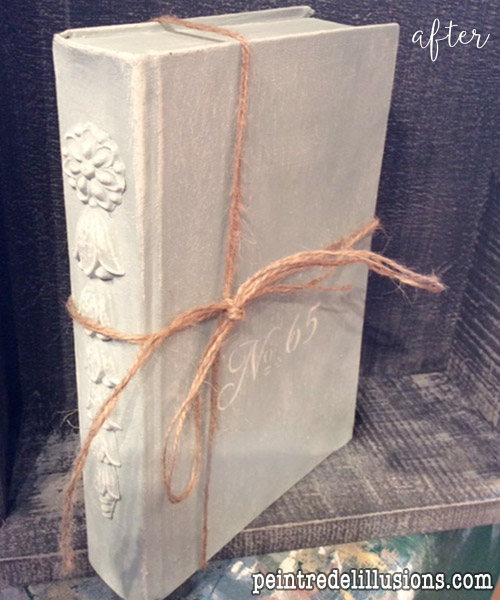
Johanne at Efex dressed up this book by gluing a wooden applique down the spine, then chalk-painting the whole thing.
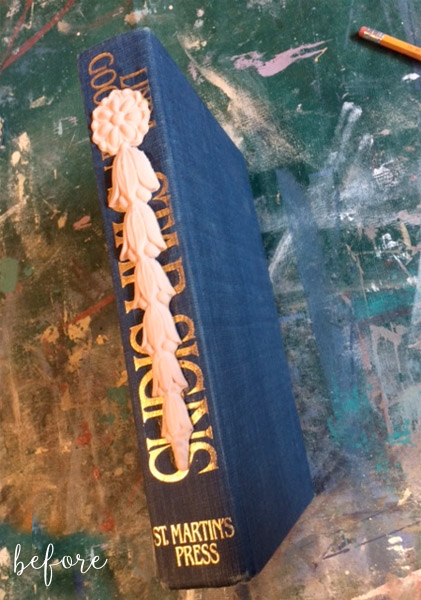
painted book before


painted book makeover

Doesn’t it look like it was always part of the book? She did a great job with her paint technique to realistically age it, and I also love the delicate little stencil on the front. A few of these scattered around would make a lovely addition to any bookshelf.


Maybe you have a lot of books, and their clashing colors and spine designs make you crazy. I have a friend who turns all her books around so you only see the pages and not the spines. Great for a cohesive look, not so much for finding the book you want.

Lauren at Bless’er House found a happy medium. She was never happy with her bookcases and felt they look cluttered and unorganized.  She came up with a solution after seeing a set of ‘French mute books’ for sale at Restoration Hardware.
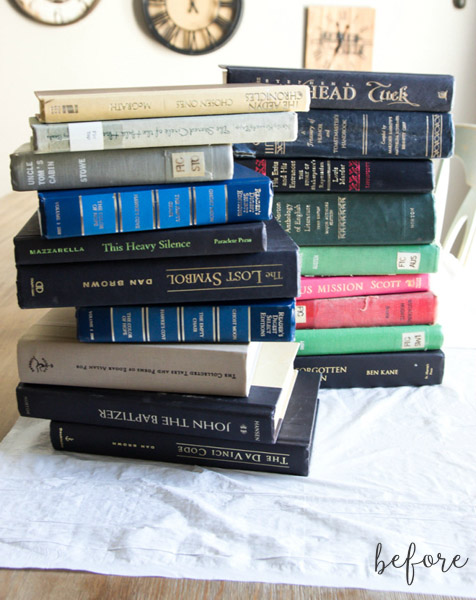
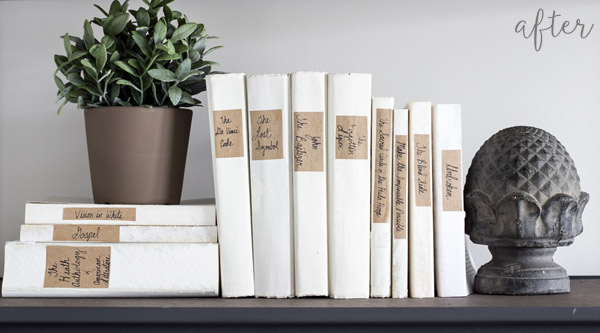
French Mute Books Before

French Mute Books

Basically the ‘French mute books’ looked exactly like this and cost $125 more. Her DIY version cost practically pennies and looks just as good! She painted her books white with chalk paint and added handwritten labels on brown paper. I love this look! I’m tempted to do this to all my books, if I didn’t have the handwriting of a 4th grade boy.
4 In living room/ Uncategorized

Up Down Up Down Up Down

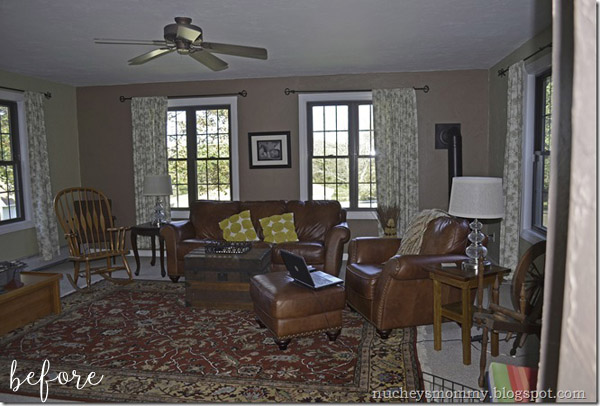
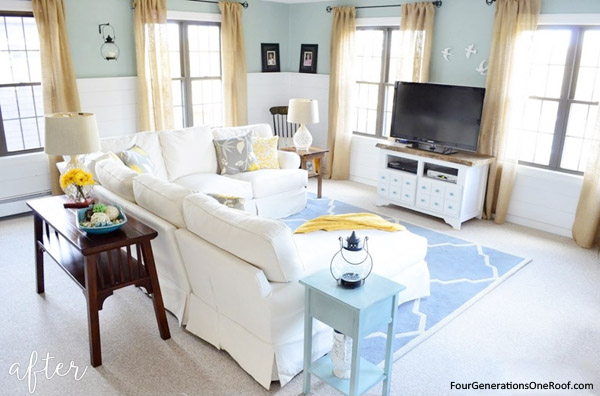
I hope your scrolling finger is sufficiently stretched out, because this coastal living room makeover is going to give it a workout.

Scroll down – “Woah!”

Scroll back up – “There’s no way that’s the same room.”

Scroll down – “Yes, I think it is. The windows are in the same place.”

Scroll back up – “Still, I’d better double check.”

Scroll down – “The new furniture layout makes so much more sense.”

Scroll back up – “And such a huge change from that before wall color!”

Scroll down – “Loving all the details here. Cute pillows, the hanging lantern … hey, are those burlap curtains?

Scroll up one more time for good measure

Scroll down – “I’d give it two thumbs up, if my hands weren’t already exhausted!”


coastal living room makeover before

coastal living room makeover after

Once your fingers recover, click over to Jessica’s blog Four Generations One Roof to see much more!

2 In desks/hutches/buffets

Add Legs, Subtract Sads!

One time, when I was a teenager and having an especially teenager-y day of the sads, my mom gave me some advice.  “Why don’t you stop laying here slack-jawed on your bed, staring dolefully at the ceiling and … I don’t know … get up?”  (I’m paraphrasing, but that was the gist). So I said okay.

Okay already! FINE MOM I’M GOING, I SAID OKAY, UGH!  I resentfully lugged myself into an upright position and went out for a run. And do you know what? But the time I was done, I was amazed at the difference I felt. My previous mopey mood was gone! It was really that easy.

Believe it or not, the same principle applies to furniture. If you have a piece that feels overly heavy and is dragging everything around it down, listen to my mom and tell it to get the heck up. Put some legs on it and get some air under that thing.  You too will be amazed at the big difference such a simple change can make.

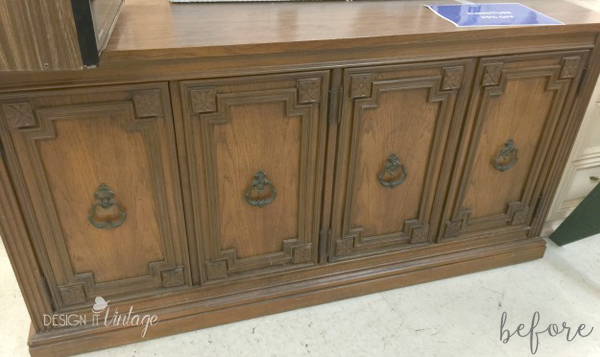
This credenza was dark and clunky, but Nicole gave it much needed lift with a new set of legs, white paint and gold accents.

White and Gold Credenza Before

White and Gold Credenza after adding legs

It’s the difference between wearing flats and four-inch heels, am I right ladies?  Ooh-la-la. See it on her blog Design it Vintage.


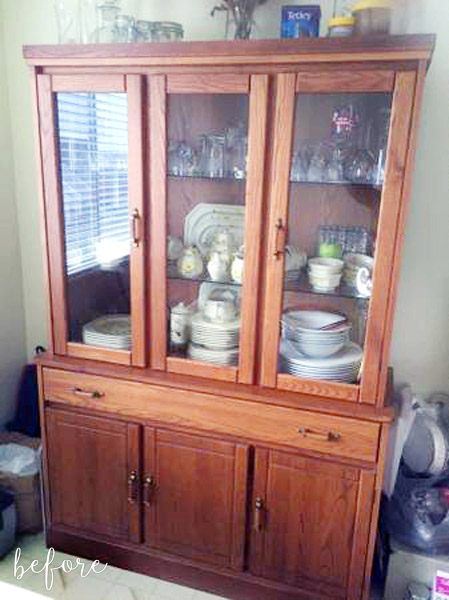
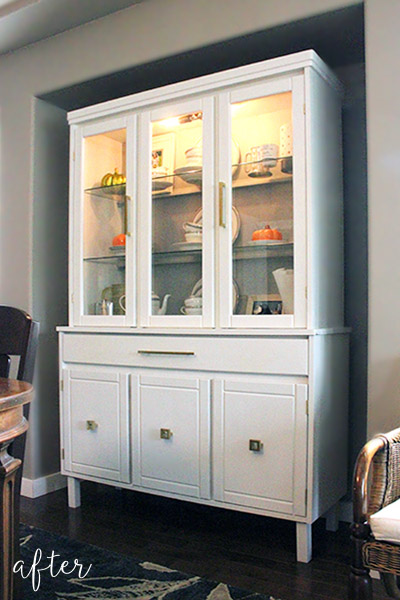
This hutch also needed space, and some streamlining in the details as well. Elaine liked its clean lines, but knew she could pare it down even more.

White Hutch with Square Knobs Before


White Hutch with Square Knobs after adding legs

She painted it white, obviously, removed the apron at the bottom, then added 6″ parsons legs, which were an especially nice choice, as they echo the thickness of the cabinet door directly above them. All the outdated knobs were replaced and rearranged to the center of the doors and drawer.

It’s a totally new look! This hutch is ready to take on the world now. Or at least, ready to take on the task of holding stuff and looking nice, which is truly the pinnacle of hutch achievement.

See more from Elaine at Visual Meringue.

10 In kitchen/dining

Only Settle for the Best

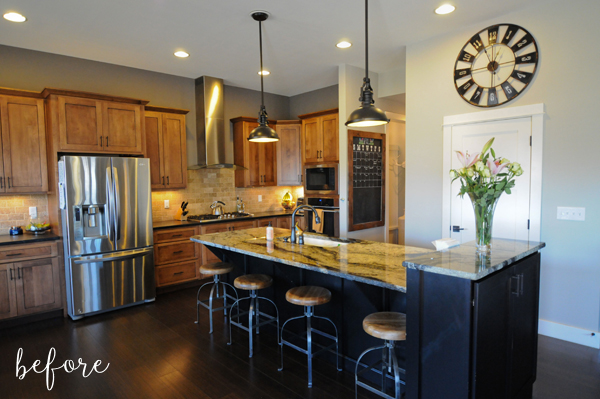
This before kitchen was like that perfectly nice guy you dated in college. He did everything right. He checked all the boxes. It looked like a perfect match to everyone else. But he just didn’t do it for you. Whenever you were together, you had that nagging feeling … “Something is not quite right here.”

“What are you talking about?!” your friends and family would demand. “Can’t you see he’s perfect?”

“He’s great!” you admit, “but he’s just not for me.”And no one would believe you.

“Stop being so picky!” “You don’t even KNOW what you want!” “Any girl would consider herself lucky to have this kitchen, er, guy!”

Until you went and found your truly perfect match.

kitchen before

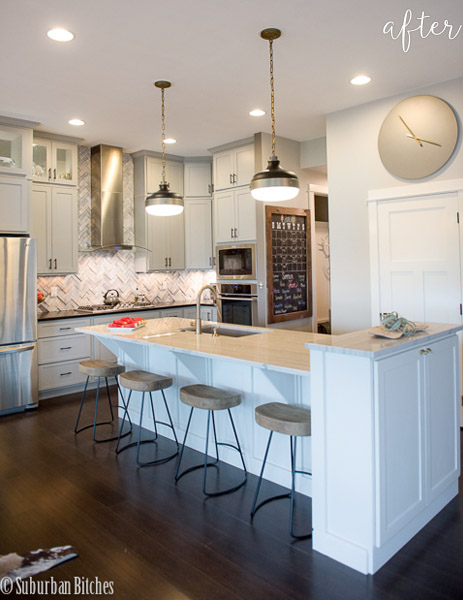
gray cabinets kitchen makeover - after

“Ohhh!” everyone you know softly exclaimed.  “We get it now.”

So the moral of the story is: don’t settle! If your heart is longing for a light, modern kitchen with gray cabinets that reach all the way to the ceiling and a white island and a reclaimed barnwood herringbone backsplash, you go get it girl.

This stunning kitchen belongs to Erin and you can see all the details and the step-by-step process it took to achieve this makeover on her blog Suburban Bitches.

10 In kiddie

Merry Kitchmas: a kid kitchen makeover

It’s never too soon to teach your kids their way around a kitchen. For instance, not to brag, but my two-year-old son is already somewhat of a cheese artisan. He loves to stand in front of the fridge and scream “CHEEEEEEEEESE!!!” until I open it and hastily give him a cheese stick, at which point he takes one bite and throws it behind the couch. Obviously this is to continue the aging process and more fully develop its flavor. He also likes to hold down the ice maker button until the floor is covered in ice and sit in the middle of the mess sucking on ice cubes. I don’t really know what that one’s about.

Point is, he’s going places.

If you’ve got a child in your life who shows an interest in the culinary arts, why not build them a play kitchen to start practicing? Perhaps they’ll thank you by naming an artisan cheese after you someday.

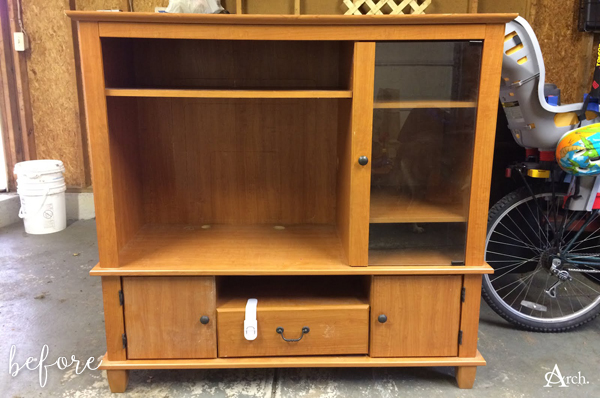
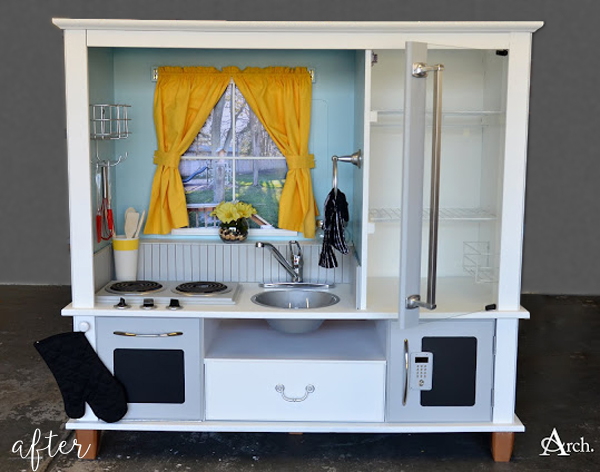
Andrea created this adorable play kitchen for her son’s Christmas present, using an entertainment center that someone was giving away.  I just never get tired of seeing these old things being repurposed!

Play Kitchen Before


Play Kitchen


There’s so much to love here, from the little shelf bump-out she built to hide the holes meant for electrical wires, to the photo in the window of her actual backyard, so her son could look ‘outside’ and see his swingset. She used a towel bar to make a realistic fridge door handle, and a calculator serves as the keypad on the microwave.

Almost everything was created out of second-hand items and things she already had around the house, bringing her total to $30! Brand new play kitchens can cost six times that. She saved a ton of money. Not to mention cheesesticks.

Get all the details on Andrea’s blog Arch.

10 In other rooms

Oompha Loompha loftity doo(over)

I’ve just decided to switch our Friday schedule to Monday, which means that the test we take each Friday on what we learned during the week will now take place on Monday, before we’ve learned it.  But since today is Tuesday, it doesn’t matter in the slightest.

Can you name that movie?

But before I give it away, let’s keep talking about tests and homework and such because I have a colorful homework loft for you to enjoy first.

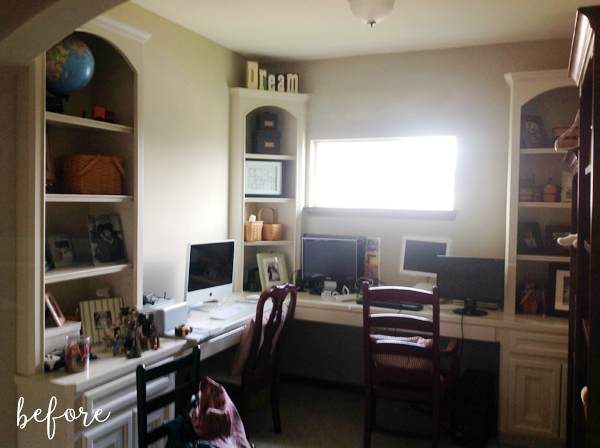
Before, it was like a plastic skeleton. Good bones but no personality. (Except I have a friend has a bunch of plastic skeletons that she hauls out for Halloween, and they seem to have a ton of personality.  She usually buckles a few in the seats of her car and just drives around. She’s a scream).

ANYWAY! Homework loft. That’s what we had here.  A nice space that needed some oomph.

Colorful Homework Loft Before

Colorful Homework Loft

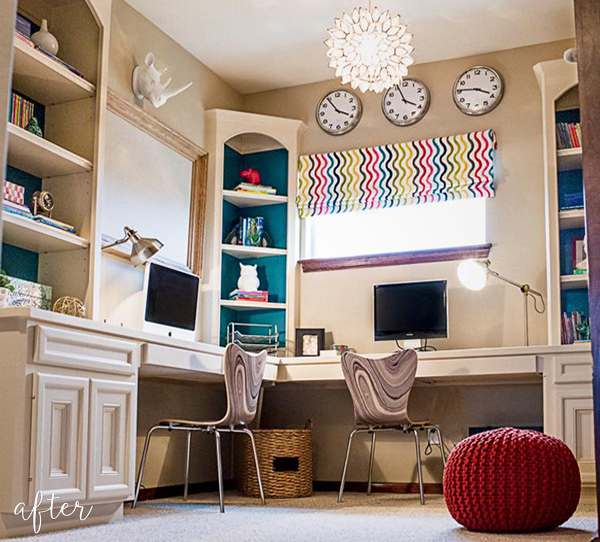
Veronica was called in to oomphify it, and she delivered a cheerful makeover that brightened it up in a big way. The accessories are really what brings it to life, and the teal paint on the bookcase backs shows them off perfectly. She even designed the fabric for the window treatment herself. Doesn’t it look like a happy place to study? I feel my brain getting bigger just looking at it.

You can read more about it on Veronica’s blog The Naked Decorator and also learn why she calls herself that … oooOOOoooh!


PS: did you guess the movie quote? The title of this post should give you a hint …


(Charlie and the Chocolate Factory)

Protected By
Shield Security PRO