0

Living Rooms

Kitchens

Furniture

13 In living room

Yay for Gray!

Long ago, beige paint was enjoying quite the heyday. I remember being super jealous of one of my first friends to graduate from apartment living into a brand new home back in 2002 or so.  Oh, to have beige walls and brushed nickle hardware! Beige was the standard, white walls were pshhhh, so boring.

But the pendulum has swung again, and beige has been bumped aside. Currently, gray is king of neutral hill, for now at least. What do you predict will be next? I’m guessing it will start back around again at white. There are only so many neutrals, right? Who knows?

But I’m still on team gray, especially since there are tons shades and variations to play with. You can have a blue-based gray, green-based gray, greige, light grays, dark and moody grays, all kinds of gray! Can beige do that? Not without veering into urine-colored territory it can’t. Ask me how I know.

So here is a rockin’ living room makeover featuring – you guessed it – gray.

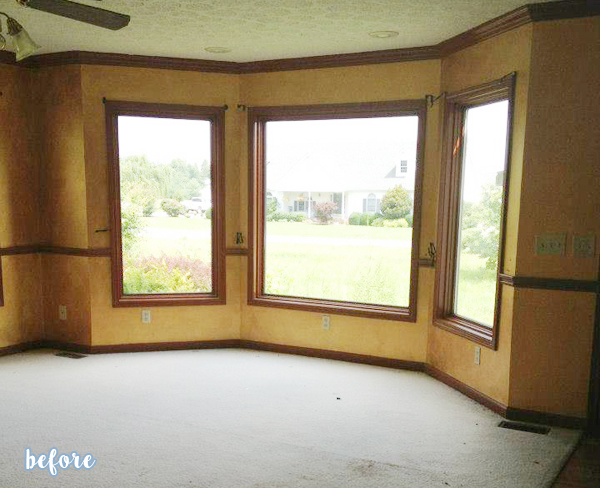
Gray and White Living Room Renovation Before

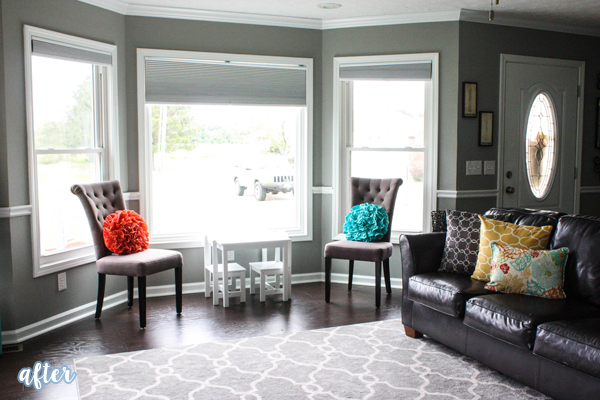
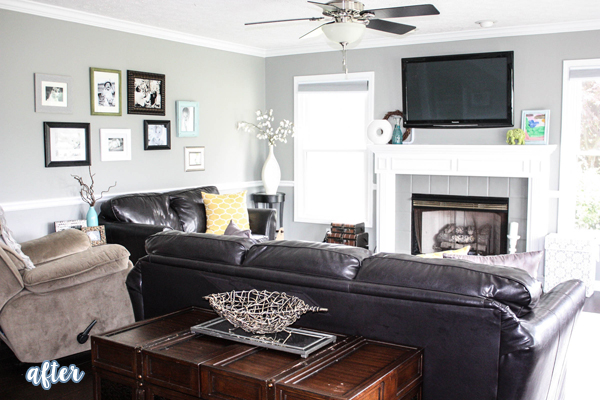
Gray and White Living Room Renovation

Doesn’t it make the white trim pop? (I’m sorry, I really hate that phrase “make it pop!” but alas, there is none better).


gray renovation

Gray and White Living Room Renovation 1

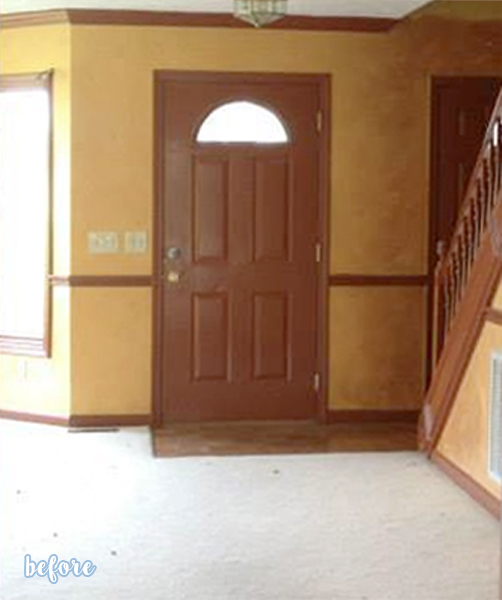
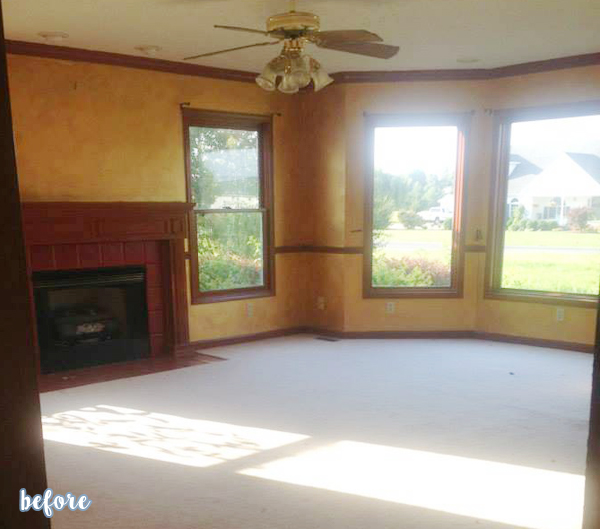
Goodbye brown and yellow (colors that should never, no never be paired together), and hellooooo gorgeous.

Gray and White Living Room Renovation before 2

Gray and White Living Room Renovation 2

Even the red tile around the fireplace got the gray treatment, and good thing, because that would have stuck out like a sore thumb literally. Red and pulsating and painful to behold. But now, its all a serene space awash in light. Fabulous update.

See more details from Brooke and her fab-ified living room at Re-Fabbed.

9 In fashion

Fashion Friday!

Get ready to haul out your sewing machine in a heated rush – it’s Fashion Friday time!

Today, your eyeballs will be taken on a journey of inspiration through ladies-wear. But first, we make a pit stop at the thrift-store and load up on some despondent duds and garish garments.

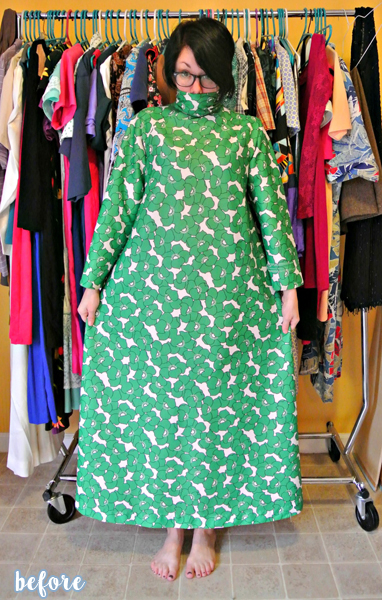
Like, for instance, this green poppy dress. Features included an ill-advised turtleneck and enough fabric to stop a bullet. Or a lustful gaze.

green-poppy-dress-refashion-b


green-poppy-dress-refashion

But Jillian reworked it into a button down mini-dress with three-quarter sleeves, and she looks so adorable! That poppy print is actually super cute in small doses.

See it on her blog ReFashionista.


Next up, you’ll never guess where Jillian picked up this XXXL Hawaiian shirt, unless you guessed Hawaii, but you didn’t because that would have been too obvious, and you’re smart like that but I guess not smart enough, because she actually did get this in Hawaii.

That’s right, she didn’t take a break from refashioning even though she was vacationing in paradise, and turned her thrift-store find into …


hawaiian-dress-refashion-b


hawaiian-dress-refashion

A Hawaiian print dress! She’s all set for a luau on the beach. Check out how she did it (no-sew!) right here: ReFashionista.


And here’s more Hawaiian hi-jinks, this time from Angela at Gallimaufry Grove who took a shapeless shift and turned into …


refashion_hibiscus_dress_makeover_b

refashion_hibiscus_dress_makeover

A form-flattering tunic! Again, the print is much easier to handle on a smaller scale.  I mean, I love a hibiscus as much as the next guy, but that was hibiscmuch. But what I love most about this makeover is that it seems so simple to recreate. If you are wanting to try some refashioning too, but don’t know where to start, why not try out something like this?

Angela says “I make my fitting decisions by finding a top that fits well and is in a similar fabric – that gives me a basic idea of size.  I lay the top over the refashion project and cut around the top, leaving generous seam allowances.  Then I do several fittings as I sew, to tweak the fit as I go.  Basically, if you own a shirt that fits, a sewing machine, and you know how to sew a straight line, you can refashion.  The hard work (sleeve-setting, zippers, buttons, etc.) is already done for you.  And at $0.71 (the price I paid for each item in my most recent thrift-store run), it doesn’t really matter if you mess it up, so there is no pressure.

Give it a shot!

And for those more advanced seamstresses, here’s a slightly more complicated tunic that started out in life looking like something your mom probably wore to (chaperone) prom.


refashion_floral_dress_makeover_b


refashion_floral_dress_makeover

But now it looks half its age!  Step one – remove shoulder pads ASAP. Steps 2: learn more at at Gallimaufry Grove. (Side note: What if shoulder pads make a comeback? I’m sure they will. Everything always does.  Have they already made a comeback? Are all the hip kids wearing them and I’m the last one to know? Should I preemptively start wearing them so I can be ahead of the trend? These are the questions that keep me up at night).


Let’s check back in with Jillian who has a knack for finding the wackiest clothes any thrift-store has to offer. A knack for wack. A wacky knack. Anyway, what is going on here?! I guess someone decided that the floral floorlength dress needed more flair, thus the red swath of material all the way to the knee and that ruffled collar were born.


red-black-floral-refashion-b

red-black-floral-refashion

And died! Jillian cut their lives short and now this old dress has just the right amount of quirk and attitude. See more at ReFashionista.


Ok, last one from Angela, and I think this one is my personal favorite.  Before: denim jumper. “Denim Jumper” are possibly the two saddest words, right behind “What party?”  And this sad thing was very dull and drab.  Looks like something you might clean the house in.

refashion_redshirt_makeover_b

refashion_redshirt_makeover

Oh, but hey! With a massive trim and a dip in dye, it’s totally date-night worthy. I would wear the heck out of that, heck yes I would.

Great job Angela! See the how-to on her blog Gallimaufry Grove.

8 In kitchen/dining

Shiny and New

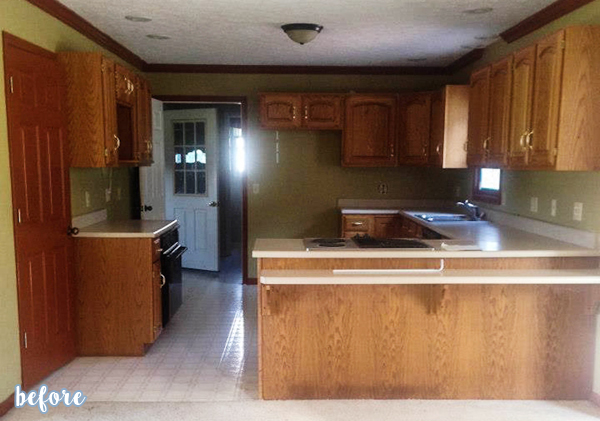
Is it just me, or did Morgan’s before kitchen seem to be, oddly, his and hers? His side was clearly on the left with the manly brown countertops and cabinets, and hers on the right with the dusty rose counters and floofy valance.  What other explanation could there be? Why the two colors?!

Morgan isn’t telling, most likely because she was just as confused about it when she bought the house, but what she lacks in mismatched-countertop-mystery-solving-skills she makes up for in legitimately helpful information: she’s got the whole rundown for DIY-ing cabinets on a budget on her site Construction 2 Style.


White Kitchen with Black Backsplash Before


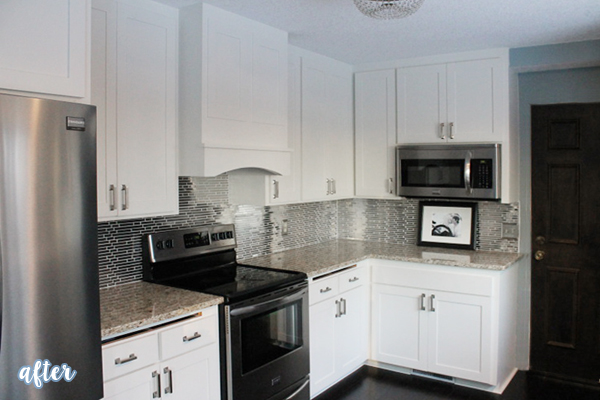
White Kitchen with Black Backsplash

Such a beautiful transformation. And how about that shiny backsplash?  If you like that and other shiny things, you are sure to enjoy Brooke’s kitchen makeover below.  Scroll your little scrolling finger on down and check it out.


Aqua and Black Kitchen Before


Aqua and Black KitchenOoooh! So bright and fun, and shiiiiiny! The backsplash looks like stamped tin panels but is actually a thermoplastic product designed especially for kitchens and bathrooms. But you can tell your friends it’s reclaimed vintage tin ceiling panels from an abandoned train station in New Mexico if you want, they don’t have to know.

Much more details on Brooke’s blog Re-Fabbed.

3 In desks/hutches/buffets

Cerusing for Love

I love the look of cerused furniture, but I’ve never given it a shot.  It looks easy enough, but it’s a multi-step process, and I’m more of a single-step gal. If it can’t be started and finished in an hour, I probably won’t get around to completing it within a reasonable time-frame. Like, my lifetime.  (I hope that’s not always true.  Maybe when my toddler grows out of his aggressively screamy stage and the temperature in my garage returns to double digits I’ll finally be a more productive human/blogger).

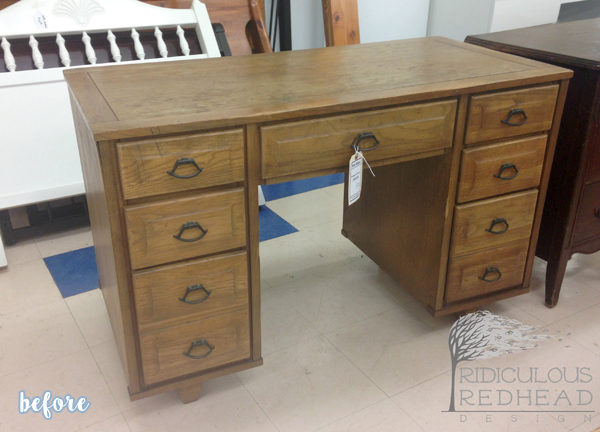
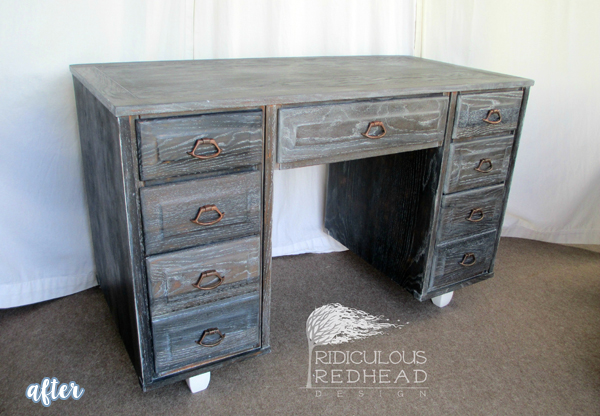
But Kelly wasn’t afraid to tackle some cerusing! Cerusing, if you are confused, is a painting technique that emphasizes the grain in the wood. This can be done with paint and stain or wax. It’s also referred to as ‘liming’. Lots of tutorials online if you want to give it a shot!

Here’s how Kelly’s turned out:

Gray Weathered Desk Copper Handles Before

Gray Weathered Desk Copper Handles

Super unique. She created this piece for a Habitat for Humanity auction, which is an organization dear to my heart. See more on her blog The Ridiculous Redhead.


I could probably find another cerusing project to show you, but my aggressively screamy toddler is currently emptying the contents of my desk drawers and throwing them at me while screaming. He’s the funnest.

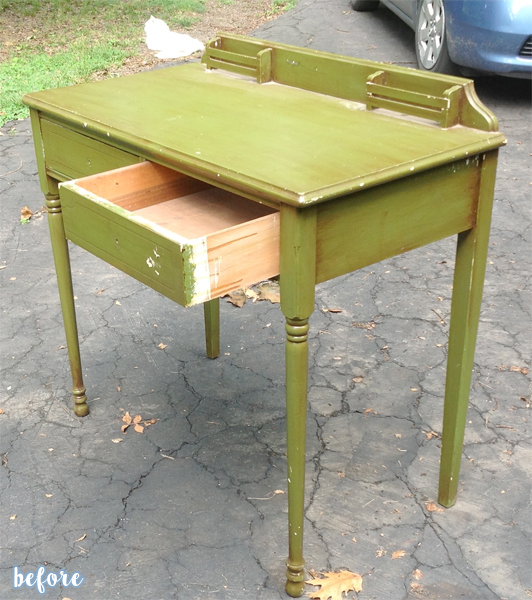
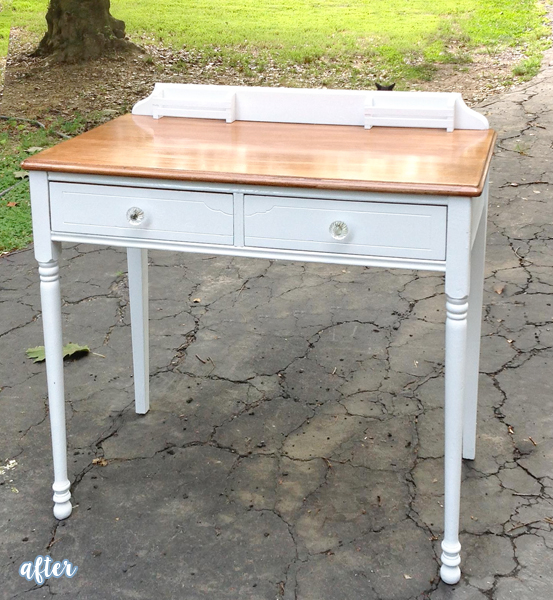
But here is one more quick desk makeover before I go! From Better After reader Jill who says, “For two days I drove past this desk at the side of the road in my neighborhood. I was tempted to drag it home (my husband asks me to wait until after dark) but when my daughter excitedly called to say “Mom, there’s a desk for you in someone’s trash!” I couldn’t resist. I was determined to finish the desk with only what I already had in my basement. There was plenty of paint, knobs left over from redoing the kitchen and poly seal left over from redoing the floors. The elbow grease and time I was happy to donate.


revived green desk

revived desk after

Pretty awesome, especially since the whole things was free!

9 In tables/dressers

We need more CORBEL!

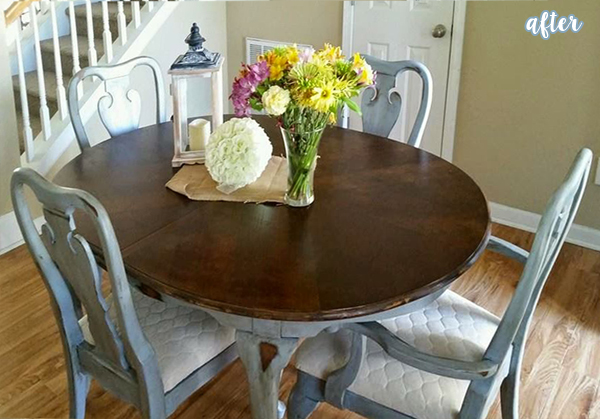
Does your furniture need a reeeeeMIX? <– (I was trying to type that in my best old school DJ voice, please imagine it thusly). Kayla’s dining room set did.

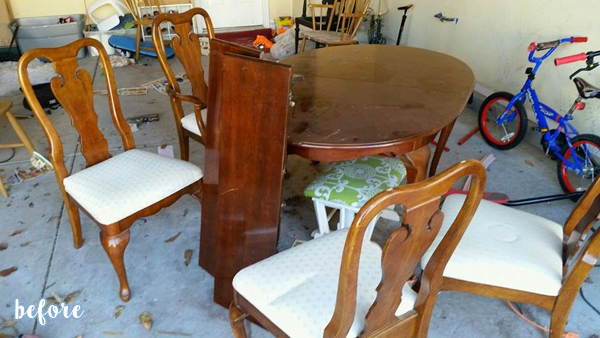
But first of all, can we talk about how she found this sweet set at Goodwill for $40?!  You can’t even buy a decent chair for that price at anywhere.

So with nothing much to lose besides a pair of Jacksons, she decided “What the heck, I’ll paint it blue and see how it ends up.”

Bluish Kitchen Table with Wood Top Before

Bluish Kitchen Table with Wood Top

Surprise! (Not really!) It ended up looking fabulous! After some distressing, wax and stain, and comfy new fabric on the seat cushions, her $40 investment paid off big. See more at Furniture Remix.


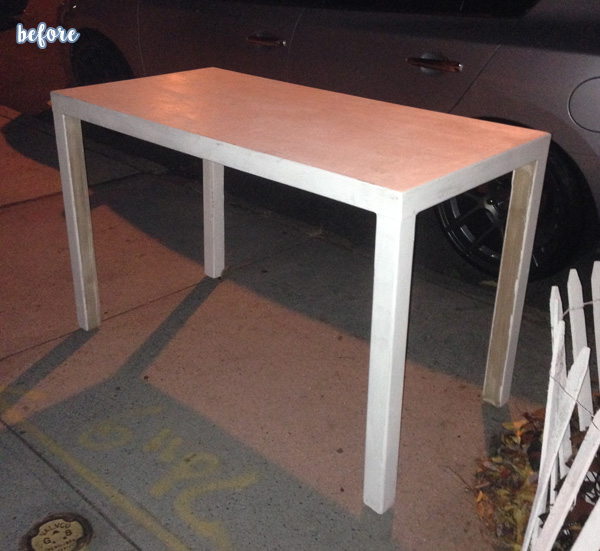
And here comes another sweet little table makeover your way. “Hmm,” you may be thinking. “That’s a pretty basic table design. I bet it got some new paint or whatever.”

Well guess what smarty pants? You’re right. It did get a new paint job. Buuuuut there’s more than that …

Aqua Cable Table Before


Aqua Cable Table Makeover After

Corbels! C’mon, that was a little unexpected, right? What a great idea for adding some flair under there. Perfect if you’ve always wanted to use corbels but never knew quite where to stick them.

Also: CorBELS? Or CORbels? Please advise.

See more at Curbside Curio.

5 In living room

Birch and Rescue

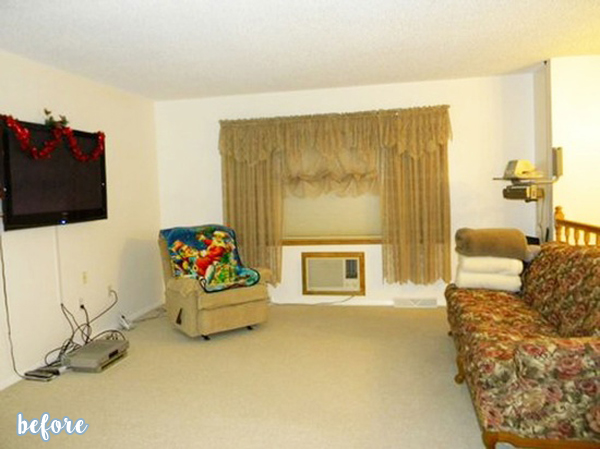
I don’t know who lived in this house before Kimberly moved in, but judging by the picture, who could it be other than an Christmas-loving old-school-VHS-watching fluffy-towel-folding grandma? I bet she was super fun. I bet her grandkids called her Christmas Grandma.

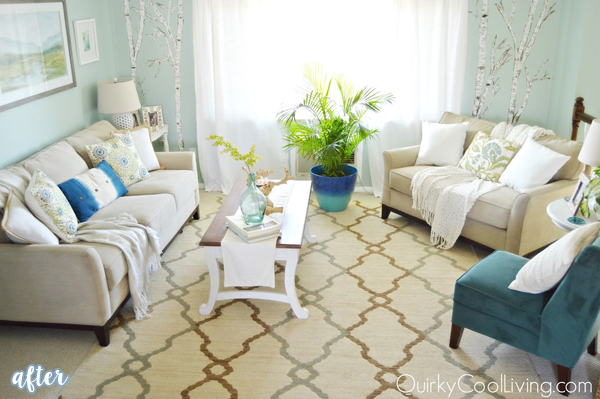
However, her decor was the opposite of fun. That’s where Kimberly came to the rescue. Behold:

Aqua Living Room with Trees Before


Aqua Living Room with Trees

Oh yeah! That’s better. There’s so much to love here, from the cozy arrangement of the furniture to the whimsical hand-painted birch trees on the wall. I love how she even painted the trim around the air conditioner and disguised it with a plant, because honestly why was that even trimmed out in the first place? Explain yourself Christmas Grandma!

Much more pics to see from Kimberly at Quirky Cool Living.

Protected By
Shield Security PRO