
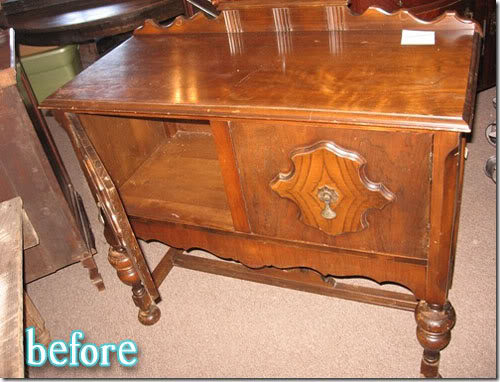
I love this little nightstand redo. The before looks to be that outdated wood treated to look speckled, like it was burned with sparks from a fire or something. Why was that ever a trend? Who knows. But it does make me wonder what we’ll be rolling our eyes about in a few years. (I’m guessing vinyl and chalkboards!)
Anyway, the after is simply lovely, painted white with a little glaze to bring out the details. Check it out on Andrea’s blog Try This! Thanks Andrea!
And will someone please point me in the direction of a good glaze tutorial? I’m somewhat embarrassed to admit this, but I have no idea what glaze even is or what it looks like. But I do know it gets pretty results!


10 Comments
Kendra @ Domestic Princess in Training
January 20, 2010 at 8:07 PMI’m loving all these chunky furniture redos. I’m seeing lately. This turned out great!
http://domesticprincessintraining.blogspot.com
Molly @ A Bit O' Shine
January 20, 2010 at 8:22 PMOne nightstand – hahaa!
I know that exact finish – I had a dining room set like that and I hated it!
Suzan
January 20, 2010 at 8:15 PMThis type of furniture and wood that was supposed to look like it had worm holes was very popular in the late 60s – early 70s. (Don’t ask how I know!) Thank goodness creative women are making it look good!
Erin @ The Impatient Gardener
January 20, 2010 at 9:53 PMThere’s a good glazing tutorial toward the end here:
http://www.allthingsthrifty.com/2010/01/painting-furniture-101.html
Jackie
January 20, 2010 at 10:59 PMfantastic!
Popcorn Served Daily
January 21, 2010 at 3:22 AMLove the nightstand transformation and I giggled at your title! I get it!
asnipofgoodness
January 21, 2010 at 2:57 PMI’m guessing burlap is what we’ll be roling our eyes at, I think I already am 😉 This one night stand is a keeper though!
Thrifty By Design
January 22, 2010 at 8:25 PMLove the transformation! Nice to see an ugly, dated piece turned into something pretty darn kewl! 🙂
Tiffany @ Mine Are Spectacular!
January 24, 2010 at 4:13 PMLOVE this Better After!!
simplyrooms
May 20, 2011 at 8:21 PMI know this is an older post of yours but glaze really is quite easy to work with since it has a delayed drying time.
It can be bought ready made from Lowes or Home Depot with color, or buy the untinted and tint yourself (the only trick with the last is you MUST make enough of one batch for the entire project or your glaze will be mis-matched if you mix later).
I also have a tutorial on my page in regards to cabinets:
http://simplyrooms.wordpress.com/2011/05/10/transforming-the-bathroom-cabinet/
Glaze can be removed with dry clean rags, sponges, dragging, stippling etc… and its the method that you choose that will make the “effect” that is left behind.